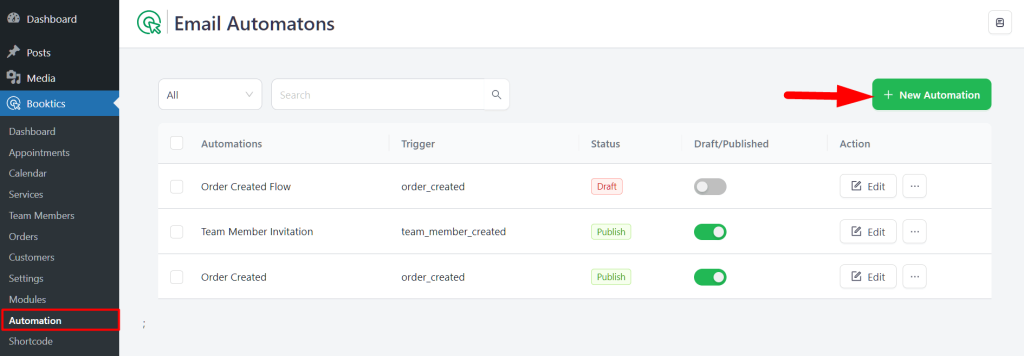
To get started, navigate to Timetics > Automation from your WordPress dashboard and click on the “+ New Automation” button.
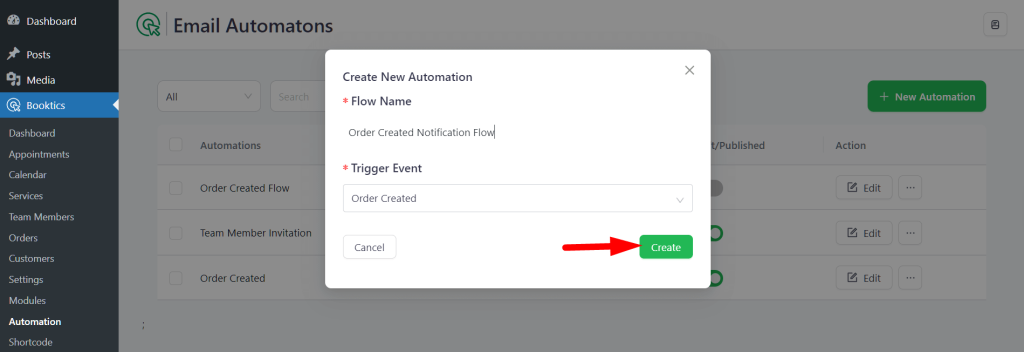
A pop-up will appear where you’ll need to:
- Enter a name for your automation flow
- Select a trigger event from the dropdown
- Available Trigger Events:
- Appointment Scheduling
- Appointment Rescheduling
- Appointment Cancellation
- Team Member Created
- Order Created
After selecting your preferred trigger (e.g., Order Created), click the “Create” button.
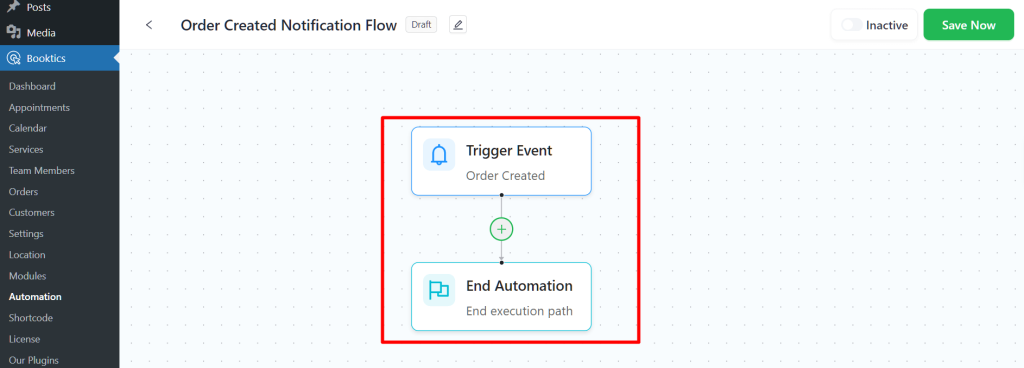
You’ll be redirected to the Automation Builder page, where you can begin designing your automation workflow. By default, two blocks will appear:
- Trigger Event – Marks the starting point of your automation
- End Automation – Indicates where the flow will stop
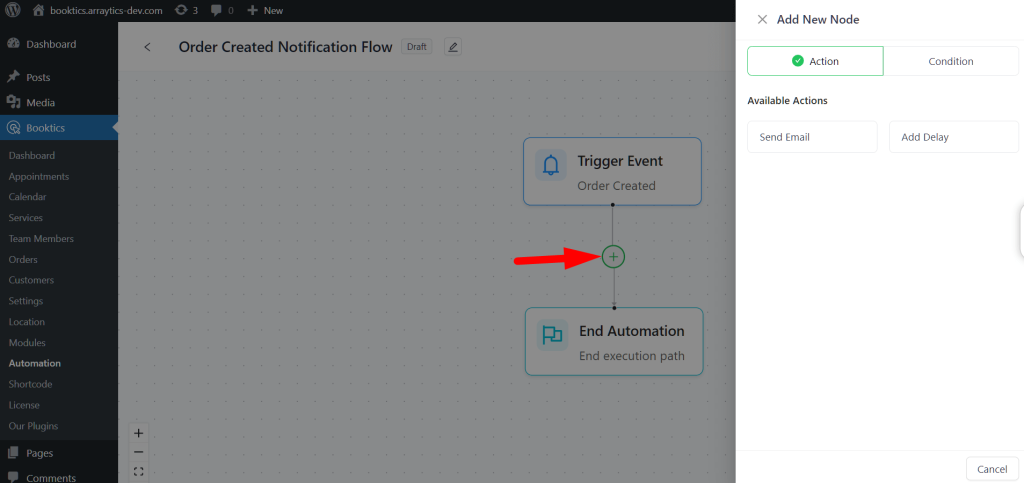
To define what happens between the Trigger Event and End Automation, click on the “+” icon between the blocks. This will open the Add New Node panel, where you can choose from the following two options:
- Action – Perform specific tasks like sending emails or adding a time delay after the trigger occurs.
- Condition – Set rules to determine whether certain actions should be executed based on specific criteria.
Adding an Action in the Automation Flow
- Send Email: Sends a customized email to a specific recipient when the trigger is activated.
- Add Delay: Pauses the automation for a defined period before executing the next step. Useful for sending follow-up or reminder emails.
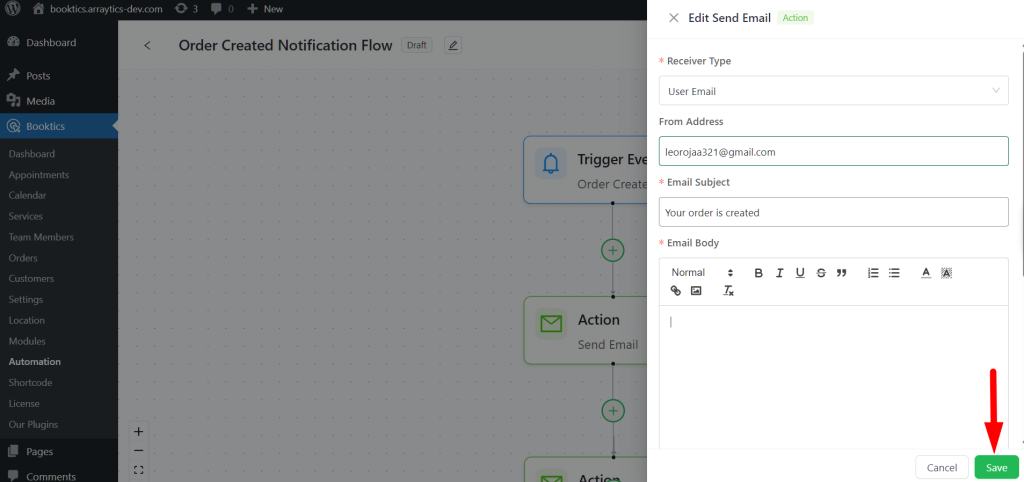
Configuring the “Send Email” Action
When you select Send Email, a configuration form will appear with the following fields:
- Receiver Type – Choose the user type who will receive the email
- From Address – Set the sender email address
- Email Subject – Add a subject line for your email
- Email Body – Write the message content. You can also use dynamic variables:
Available variables: {{order_no}} {{order_date}} {{order_total}} {{customer_name}} {{user_email}}
After completing all the fields, click Save to add the email action to your flow. This will ensure the email is sent when the defined trigger and conditions are met.
Configuring the “Add Delay” Action #
In the Automation Builder, you can insert a time gap between actions using the Add Delay action. This is helpful for scheduling follow-up emails or actions after a specific duration.
To set it up, click the “+” button between nodes and choose Add Delay. A panel will appear with the following fields:
- Wait Time: Enter the number value for the delay (e.g., 2).
- Wait Time Unit: Select the unit—Minutes, Hours, Days, or Weeks.
- Delay Condition (optional): Choose a condition if you want the delay to apply only in specific cases.
Click Save to add the delay block to your flow. The next action will run only after the defined time passes.

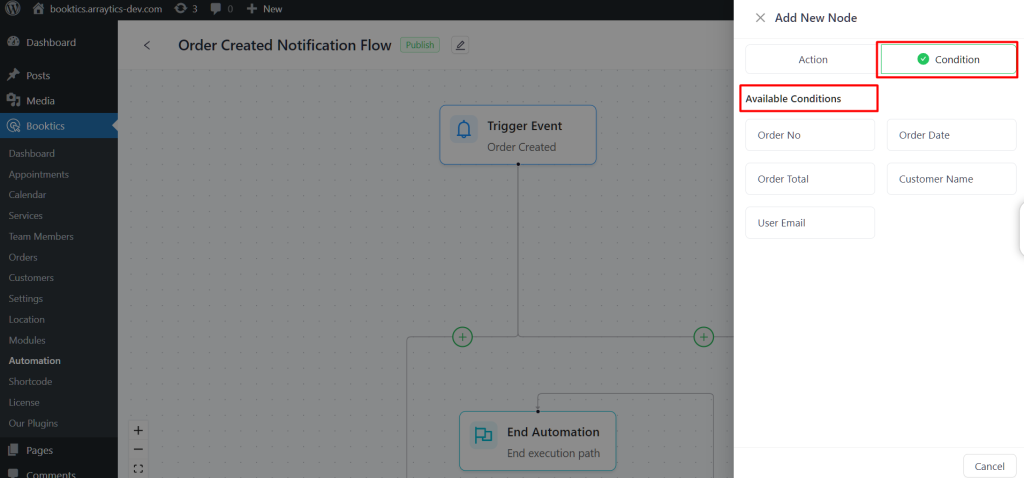
Adding a Condition in the Automation Flow
Conditions help you control who receives an action based on specific event values. This ensures that only certain users (e.g., those attending a specific event) receive a particular email or trigger.
How to add a condition:
- In the Automation Builder, click the “+” icon and select Condition.
- The Available Conditions panel will appear, showing several condition types such as:
- Order No — Filter by order number.
- Order Date — Filter by the date of the order.
- Order Total — Filter by the total amount of the order.
- Customer Name — Filter by customer’s name.
- User Email — Filter by user’s email address.
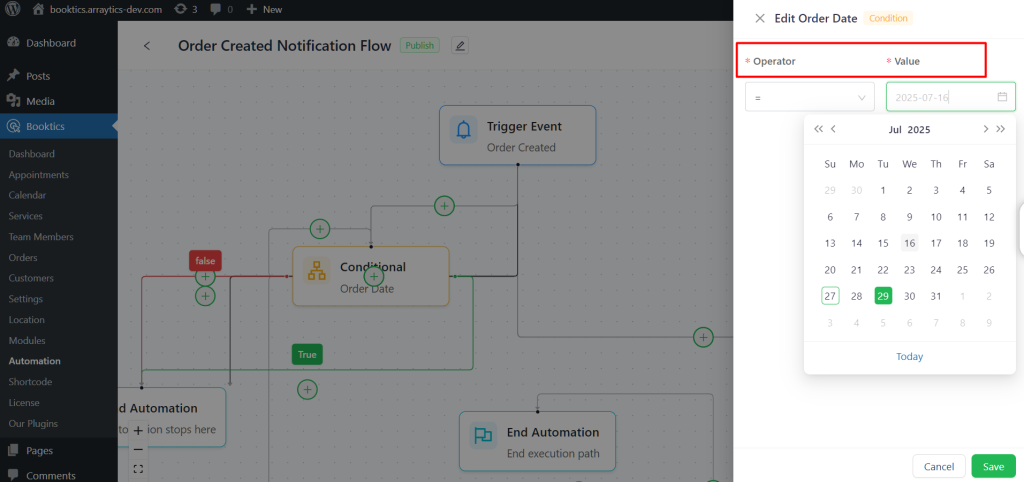
Example:
Click on Order Date to filter users based on their booking order date. You will see operators like “=”, which means the system checks for an exact match.
If you set the Order Date condition with “=”, the email will be sent only on that exact date.
After setting your condition, click Save to apply it to your automation flow.
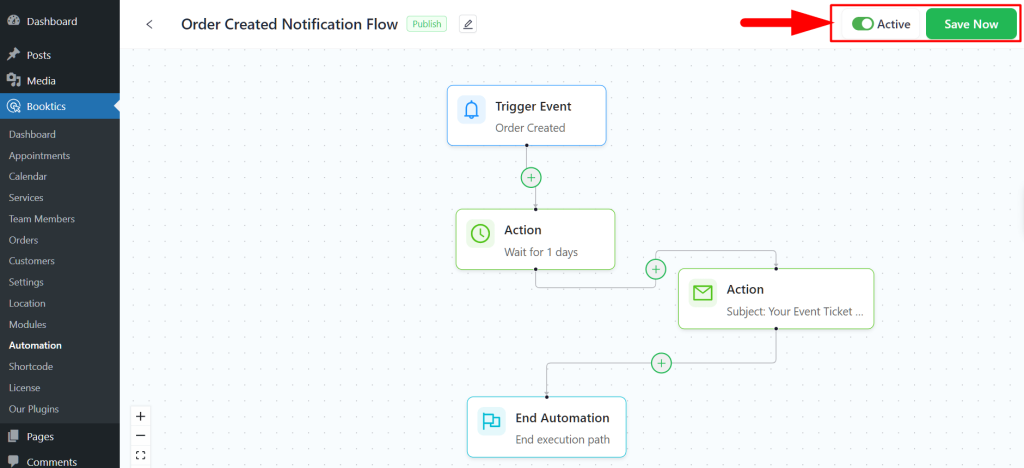
Save and Activate the Automation
After building your automation, click “Save Now” to save the flow.
Then click the Inactive toggle to switch it to Active. Your automation is now live and will run based on the trigger.