One tool for video conferences is Google Meet. Because of its excellent audio and video quality, it is the best option for online meetings. This platform for remote meetings is compatible with G Suite applications, including Gmail and Calendar.
Configure Google API
Enable the Google Calendar API by following the steps given below.
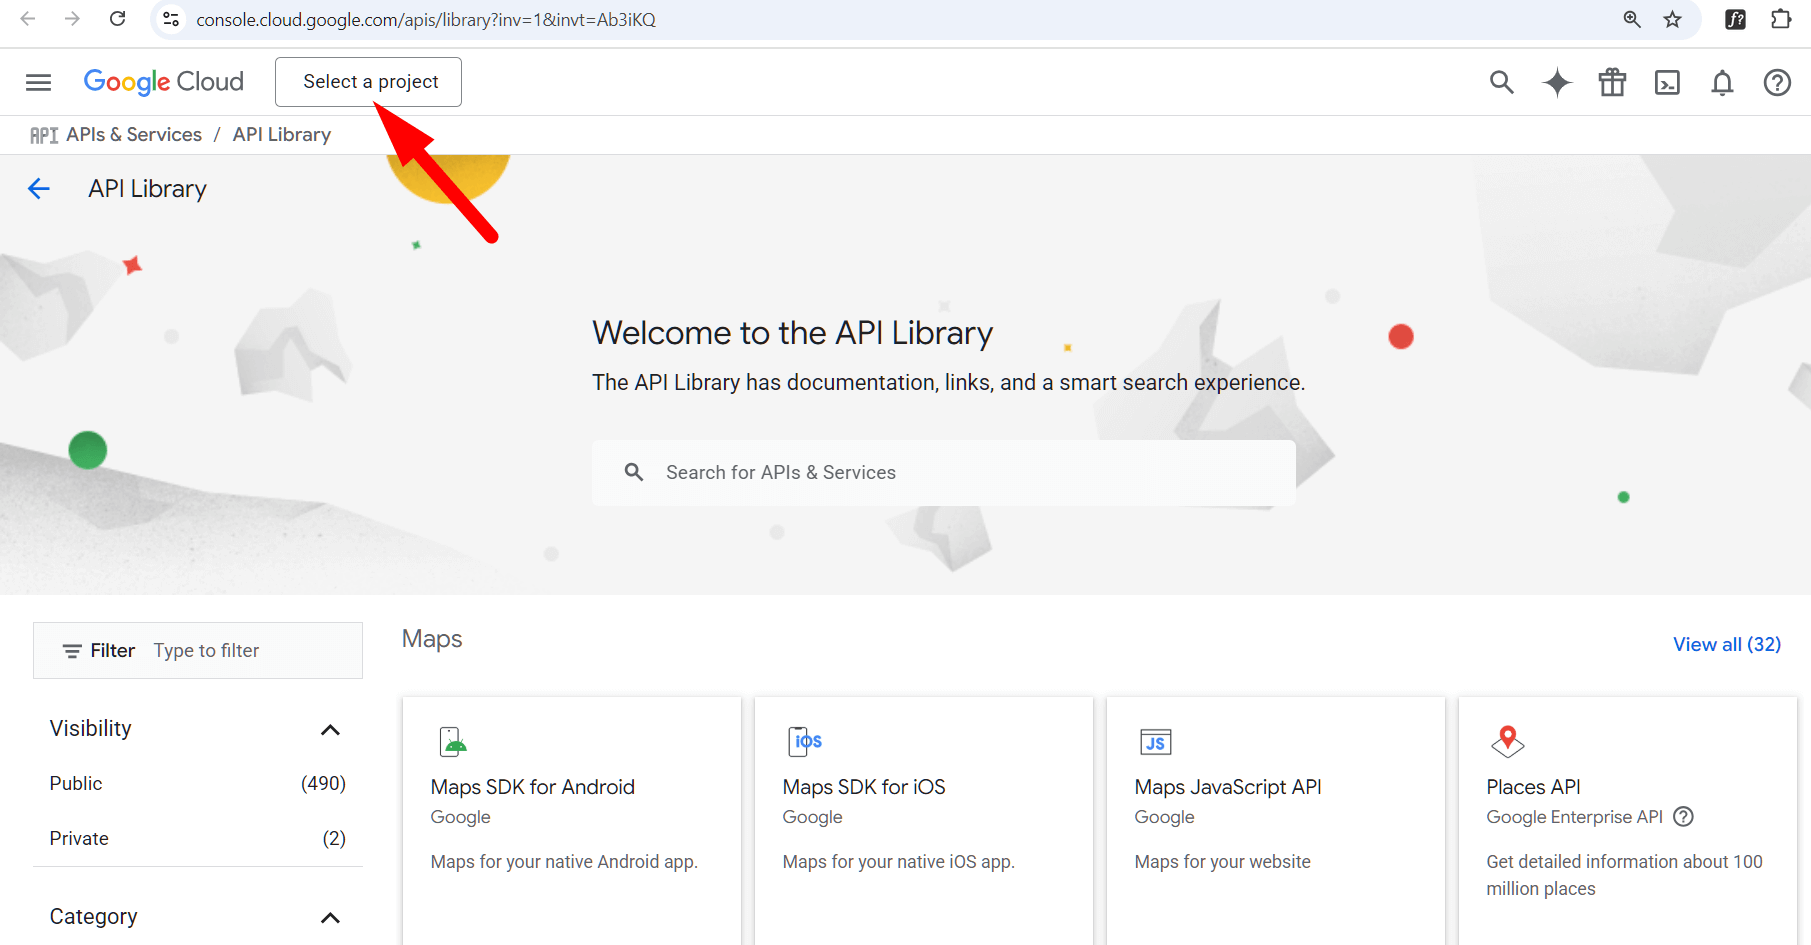
1) First of all, go to this link: https://console.cloud.google.com.
2) Now, you have to create a new project for adding a Google Calendar API key in Timetics. Click on “Select a project” dropdown.
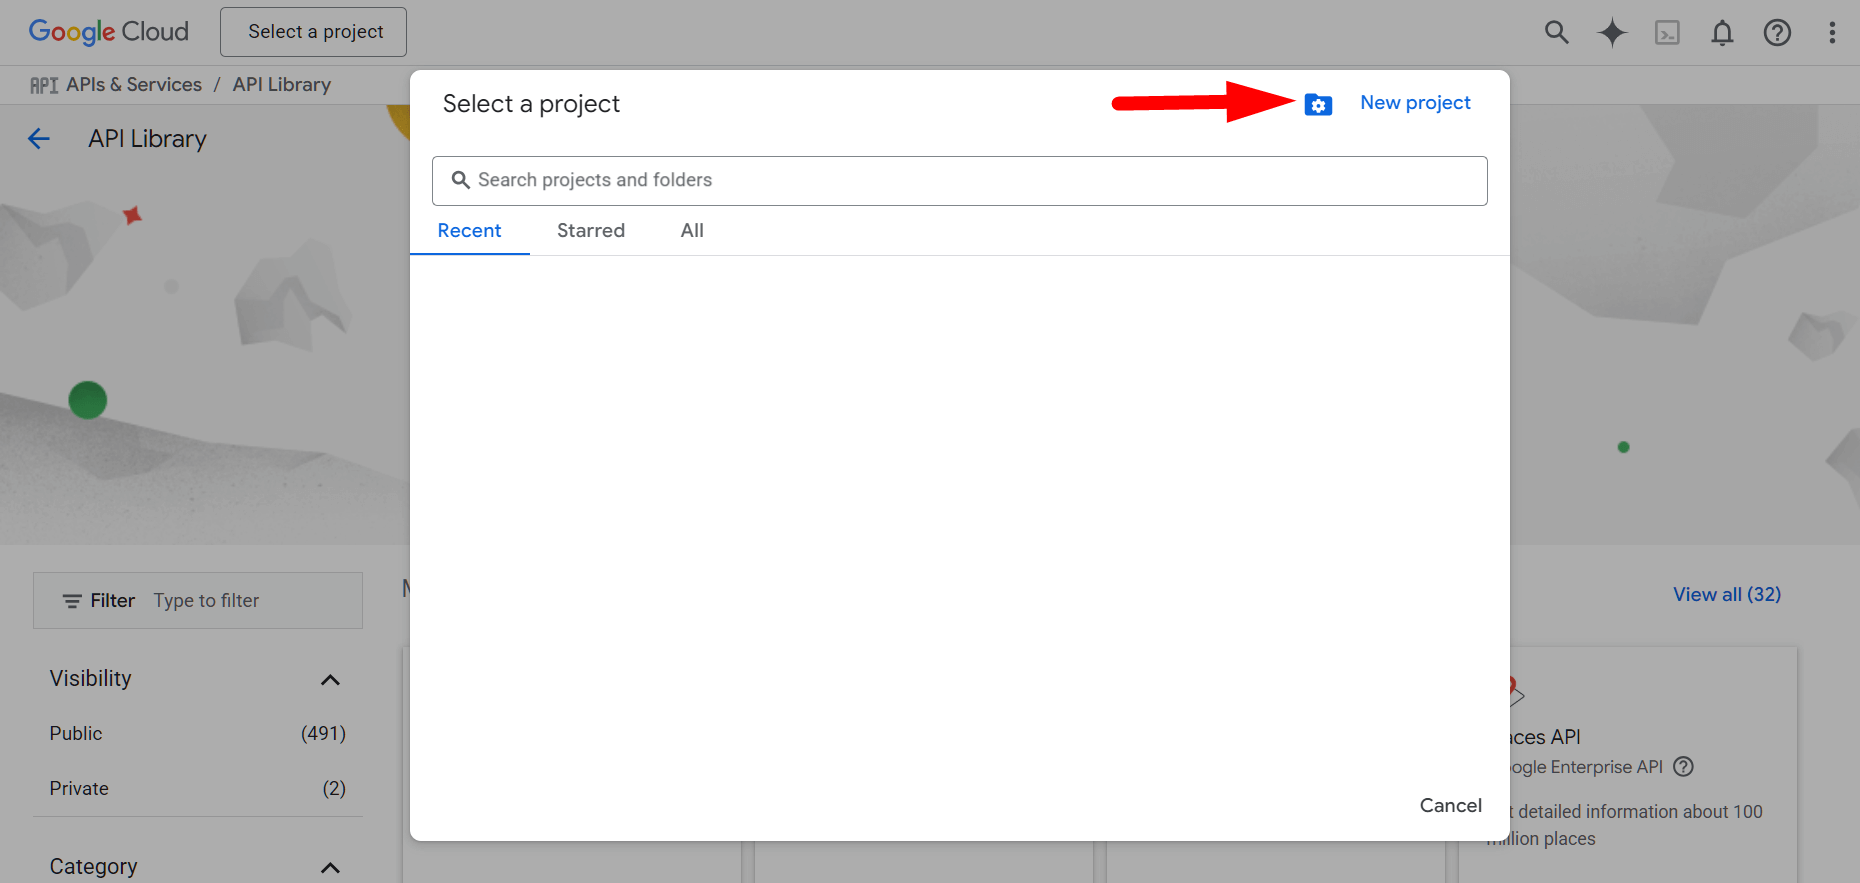
3) From the “Select a project” popup, create a new project.
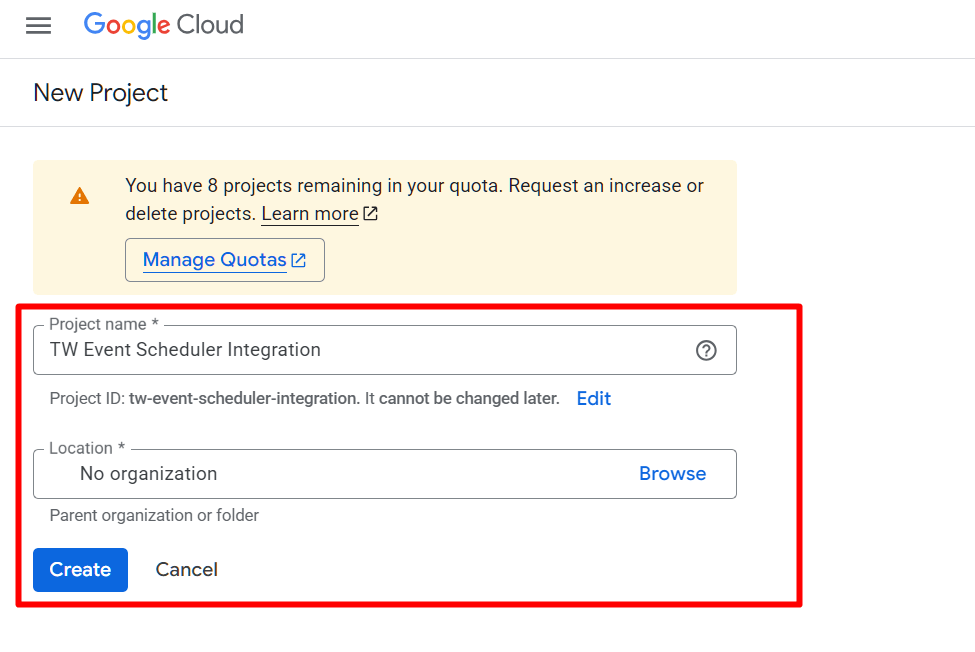
4) Add a project name and click on the Create button.
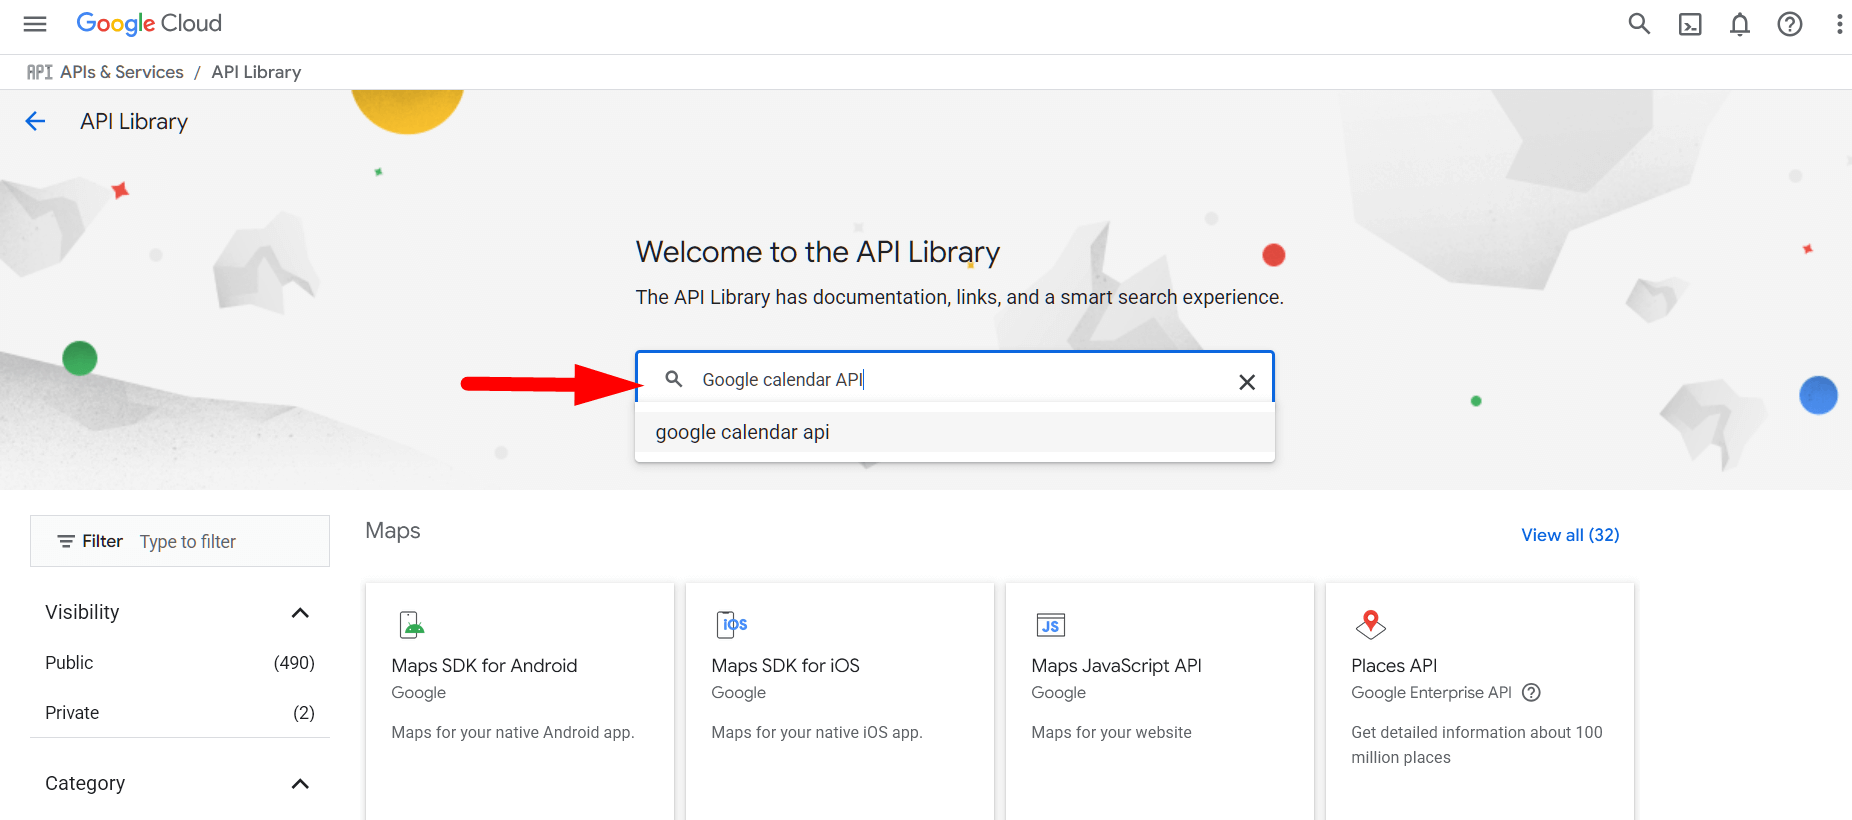
5) Search for “Google Calendar API” in the search bar.
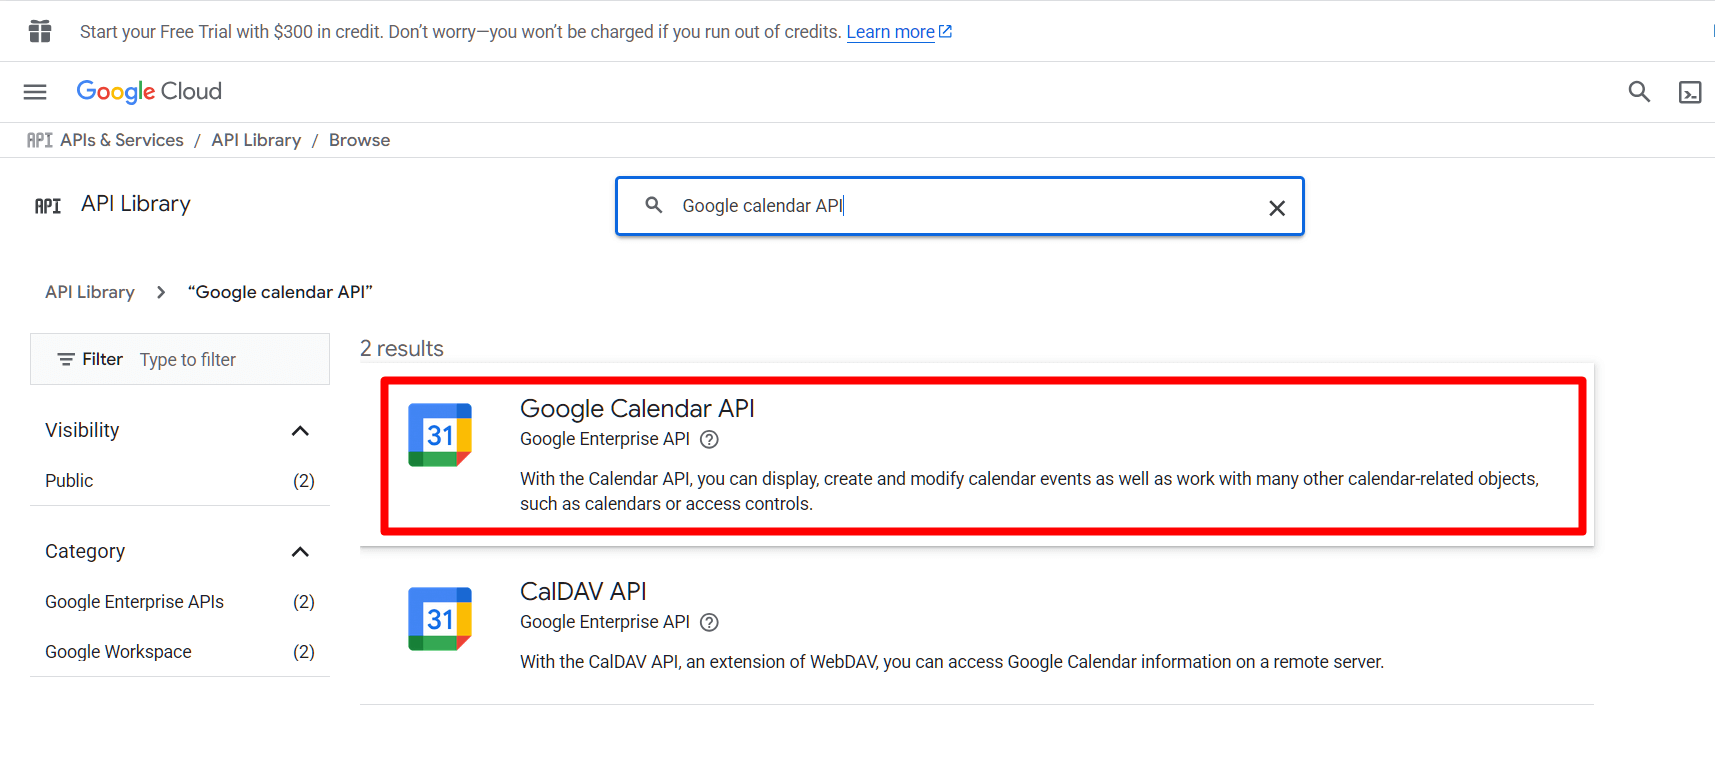
6) Choose Google Calendar API.
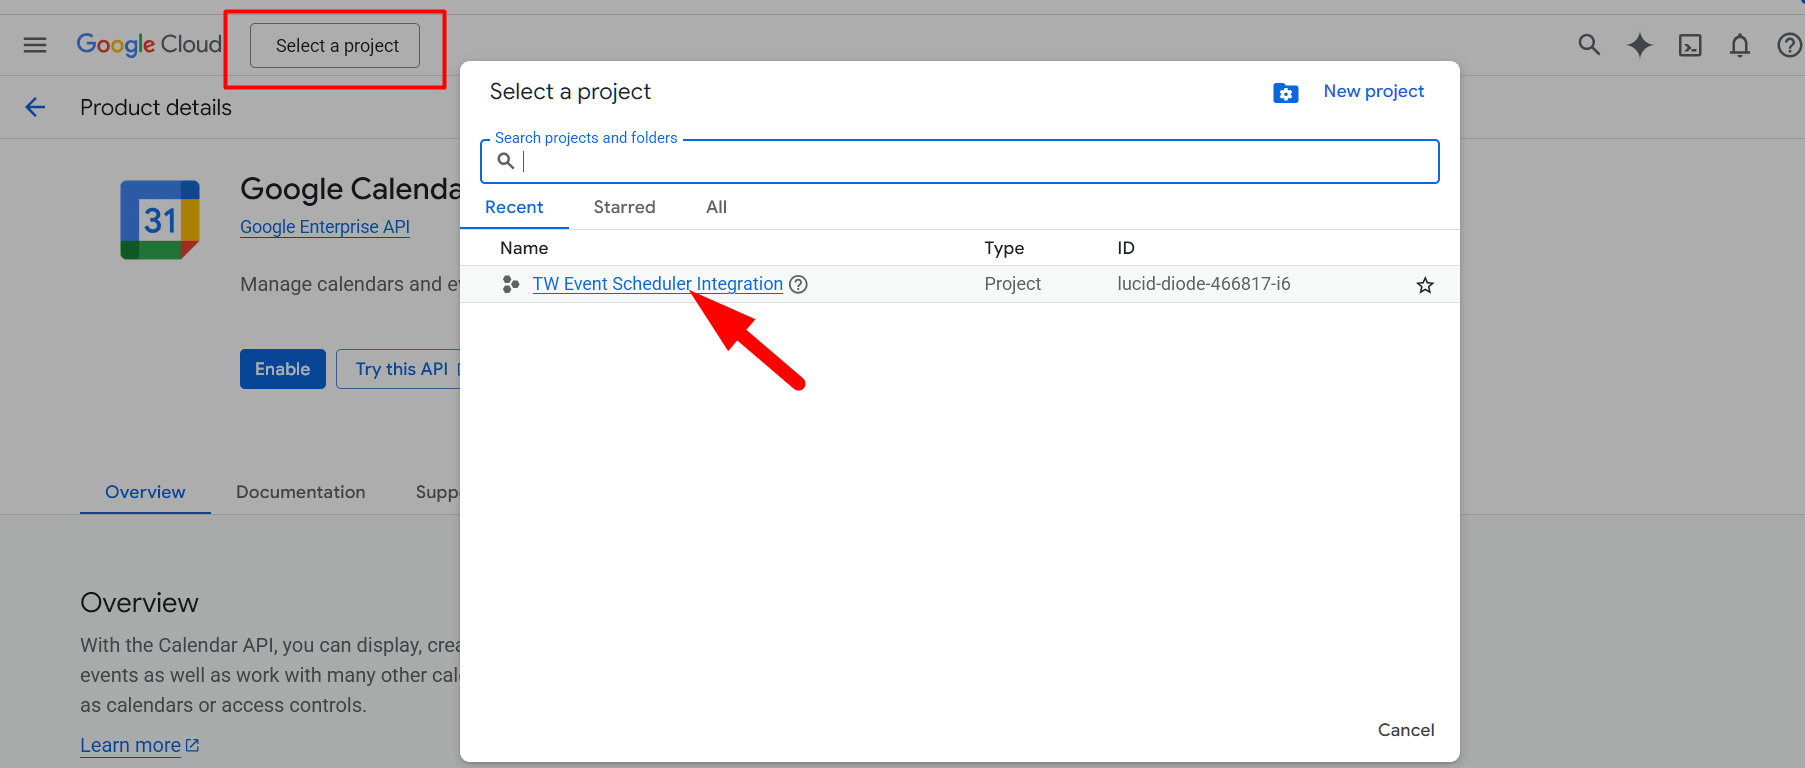
7) Now, select a project that you already created.
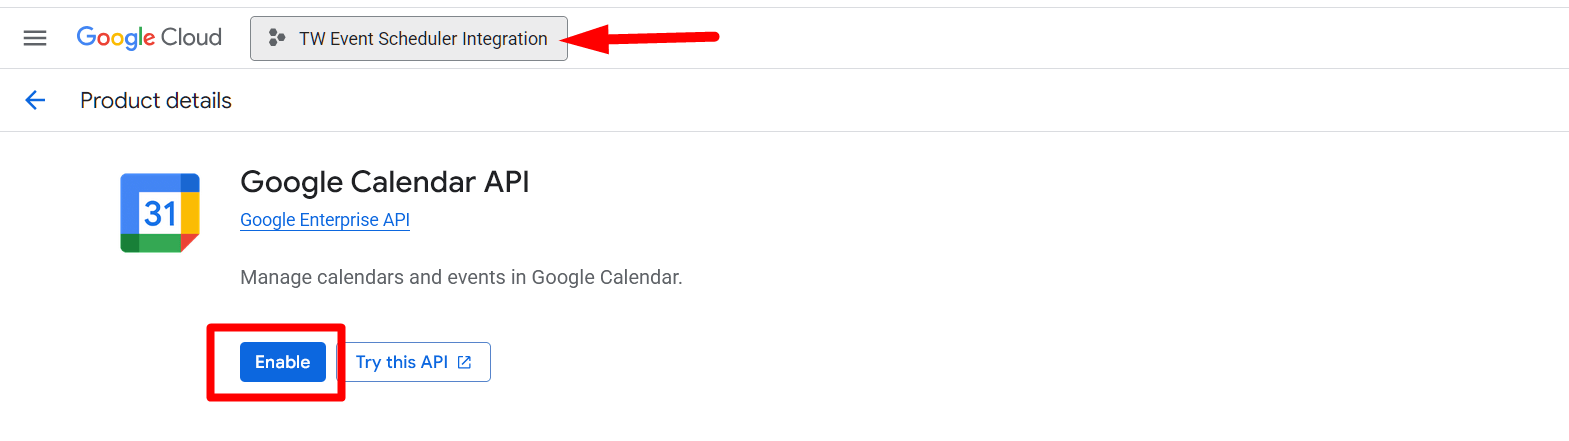
8) Enable this API by clicking on the Enable button.
9) After enabling the Google Calendar API, you will be redirected to the API/Service details page. From that page, go to Credentials from the left-hand menu. From the Credentials page, you will see a reminder to configure the consent screen.
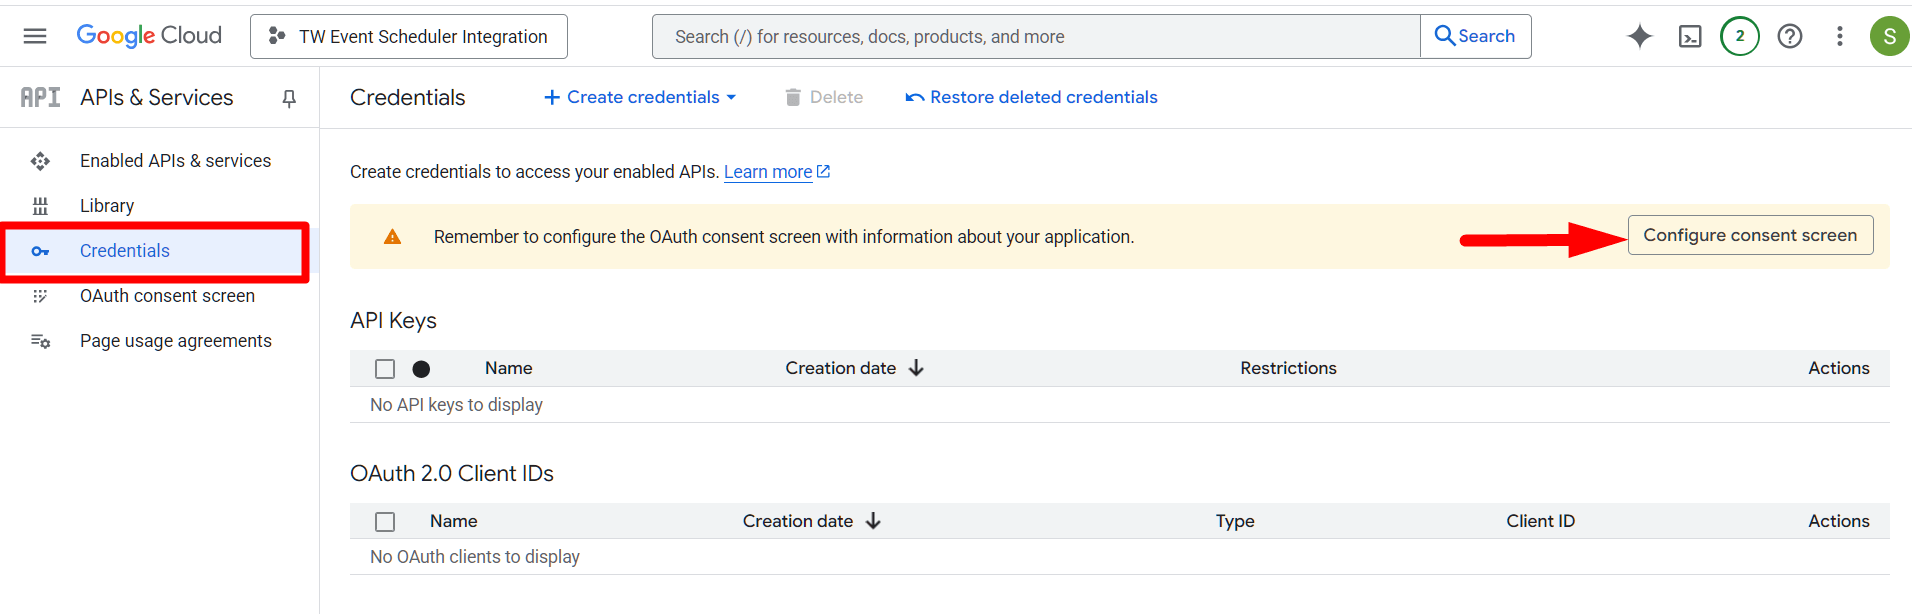
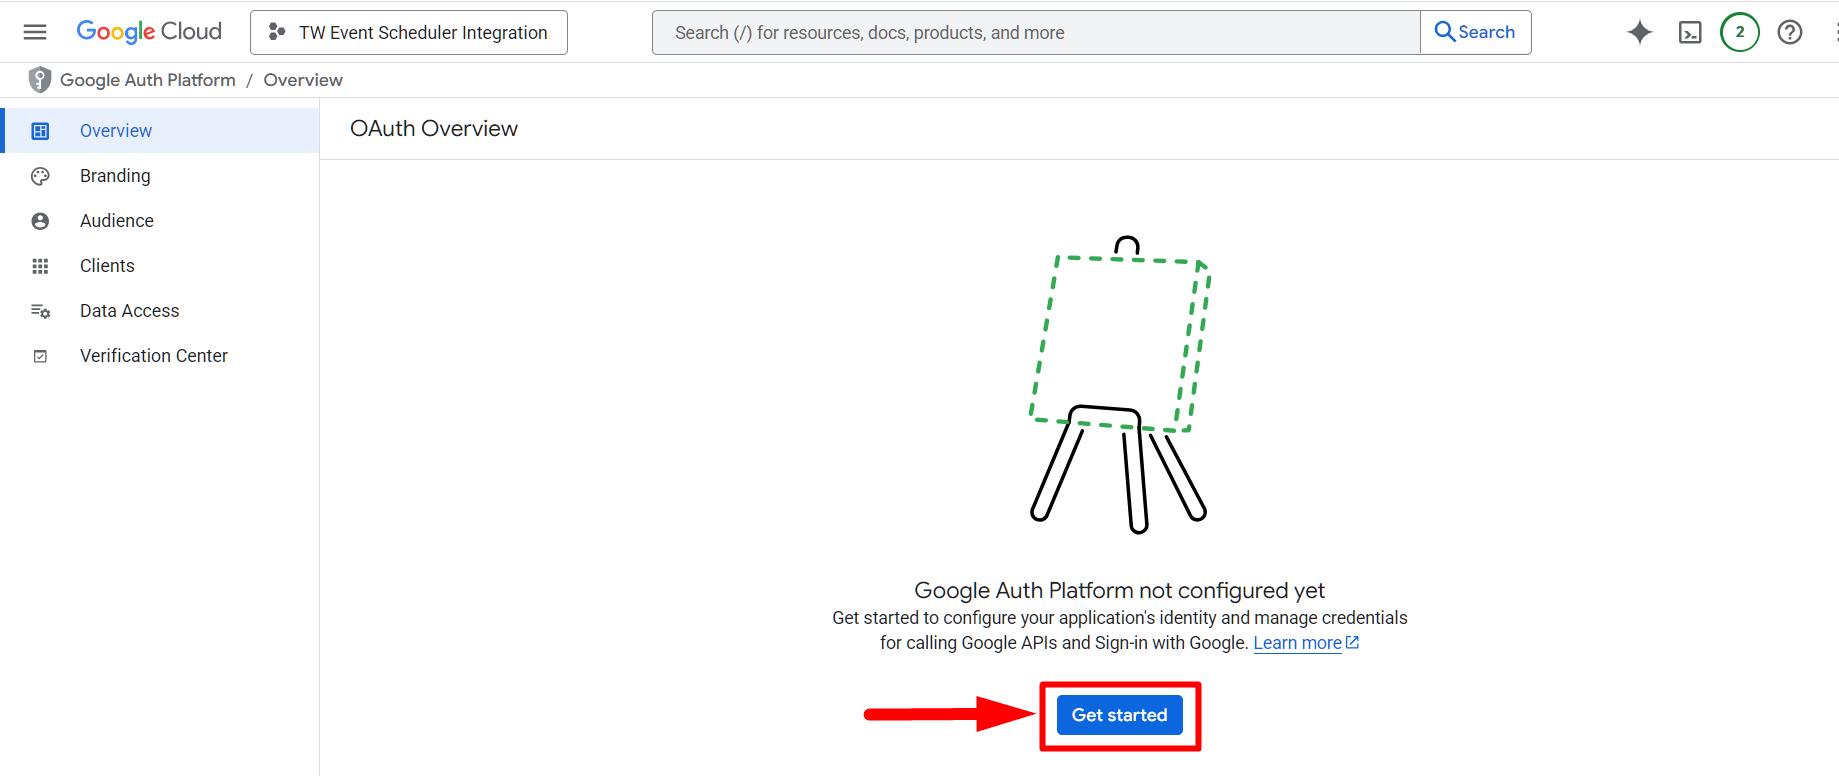
10) Click on the ‘Configure consent screen‘ button. This will take you to the Overview menu. From here, click on the ‘Get Started‘ button to begin configuring OAuth.
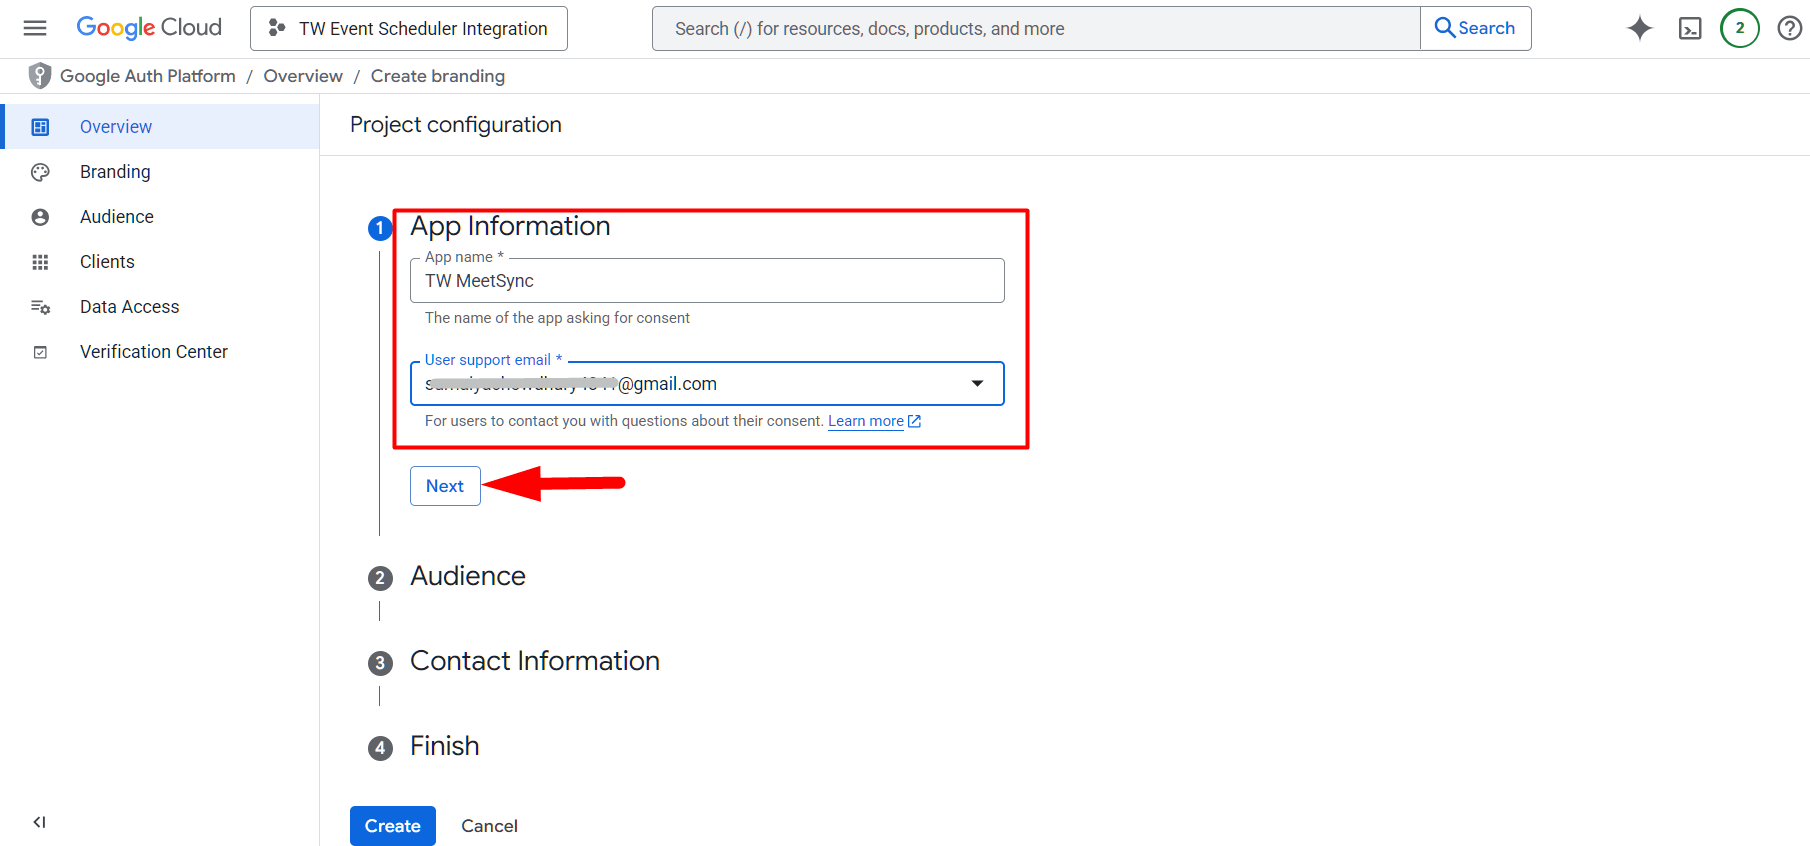
11) Now add the app information, such as the App Name and User Support Email, then click the Next button.
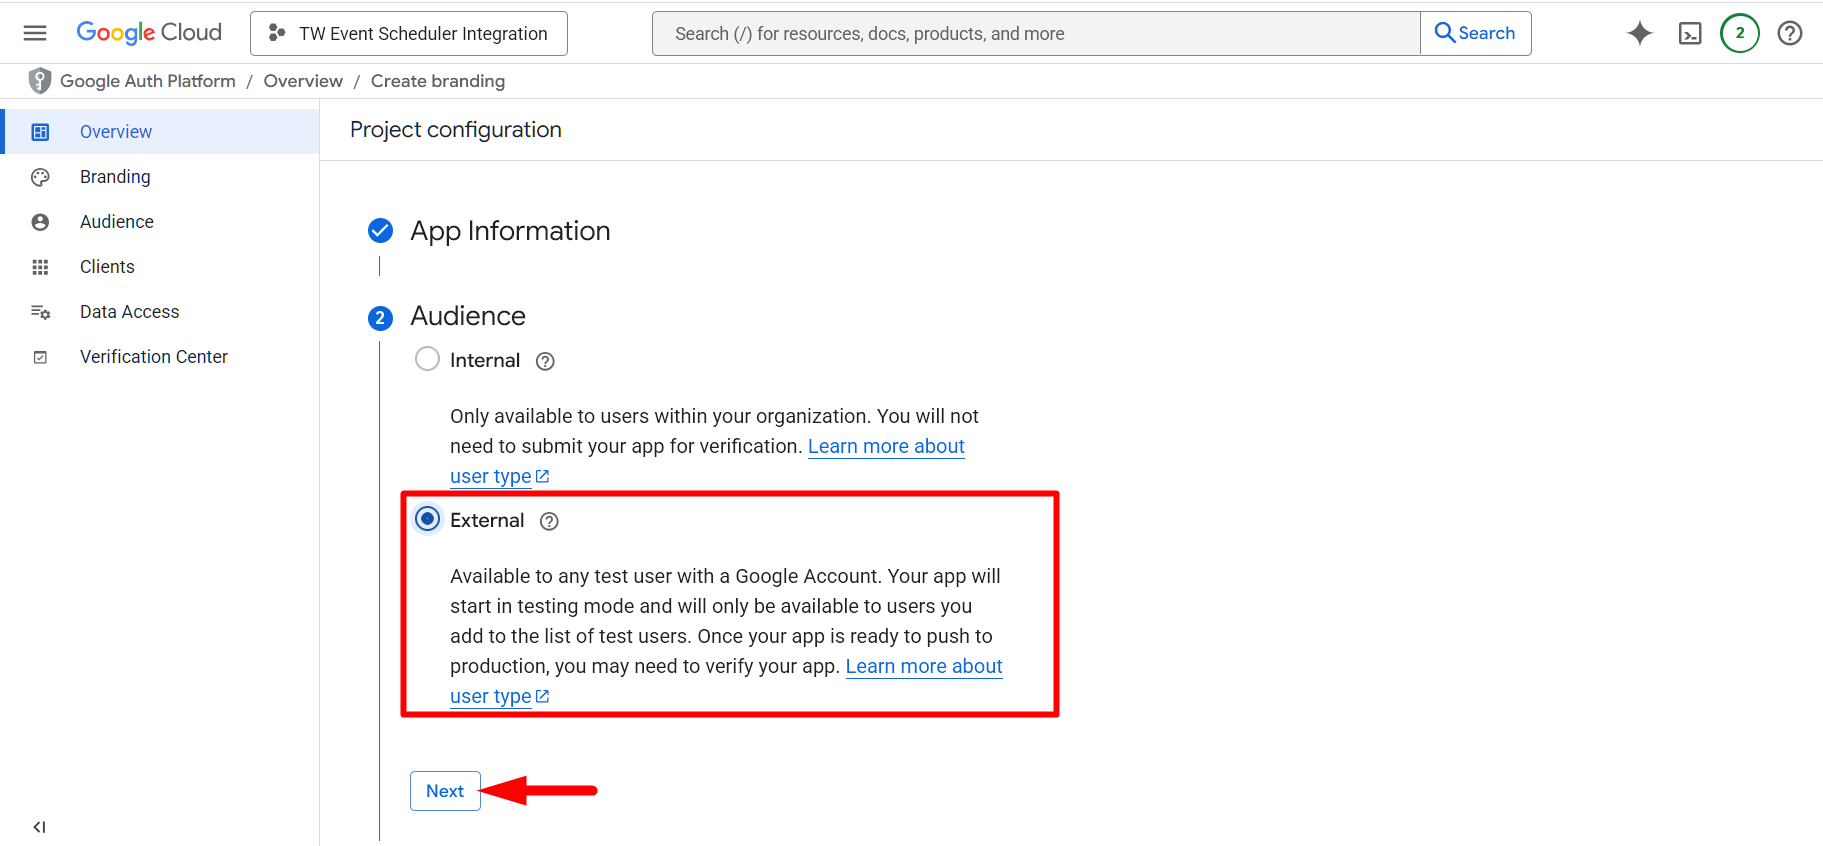
12) Select the External user type as the audience, then click the Next button.
13) Add a Contact Email, then click the Next button.
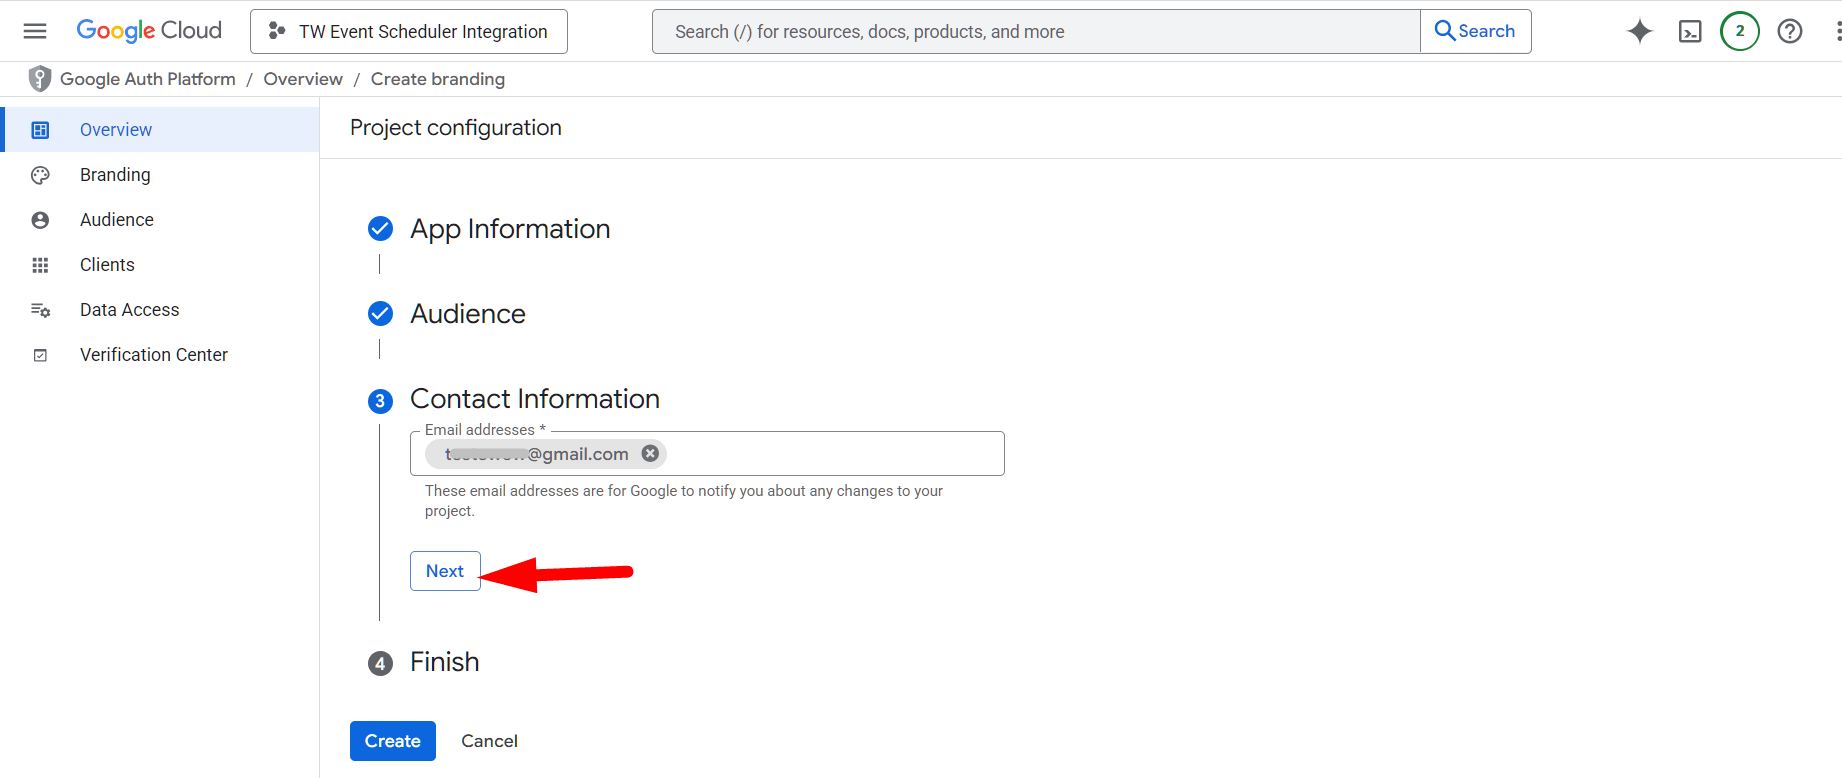
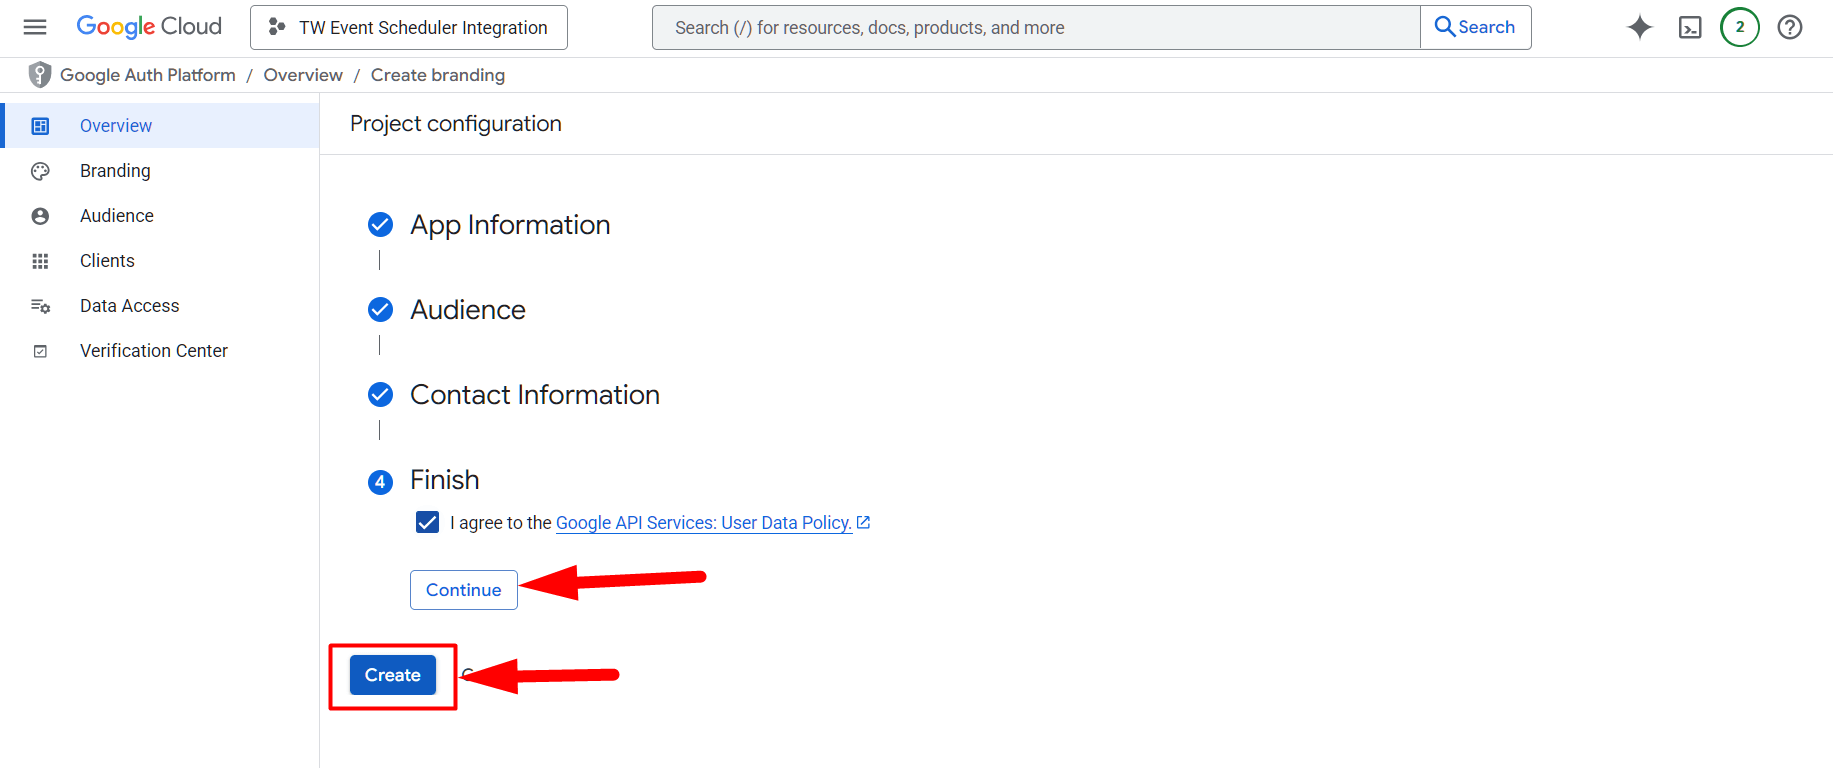
14) Check the required policy agreements, then click Continue and finally click on the Create button.
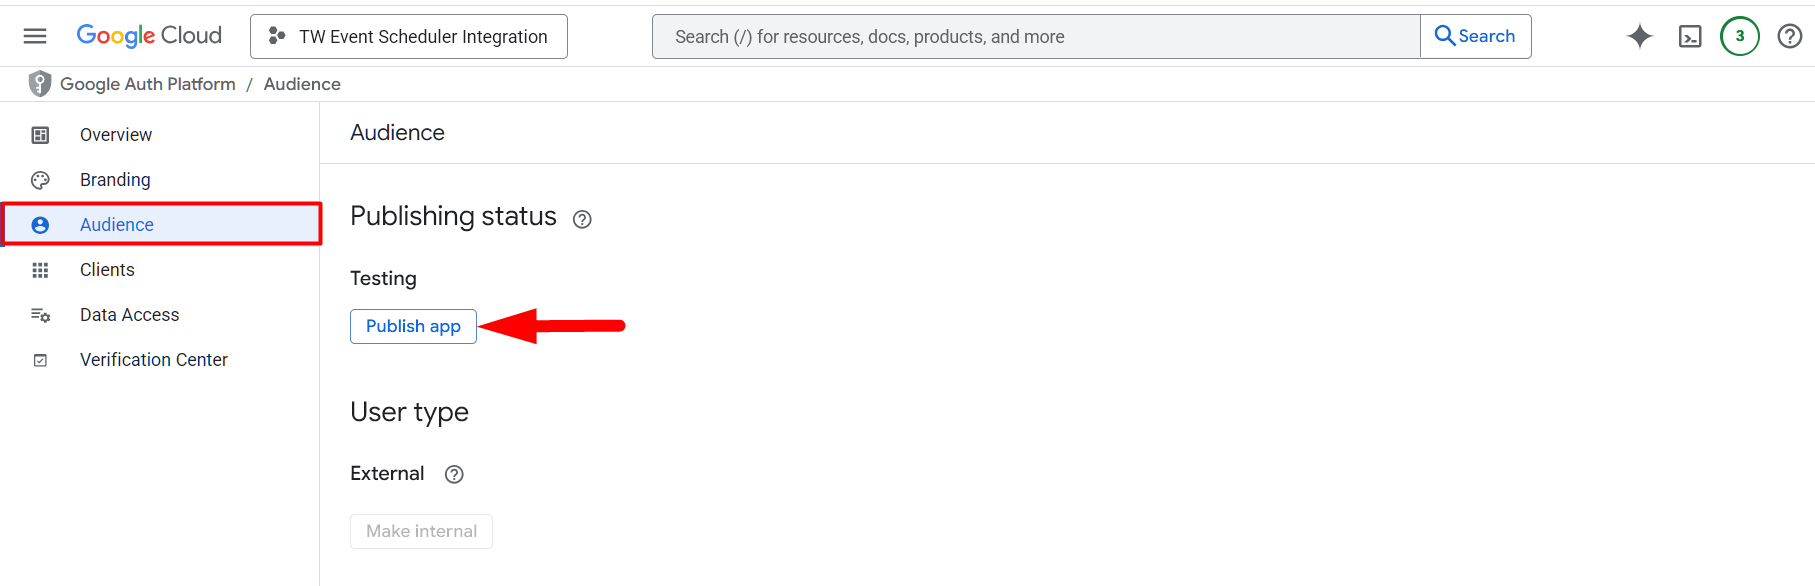
15) Now the app is created. Click on the Publish App button.
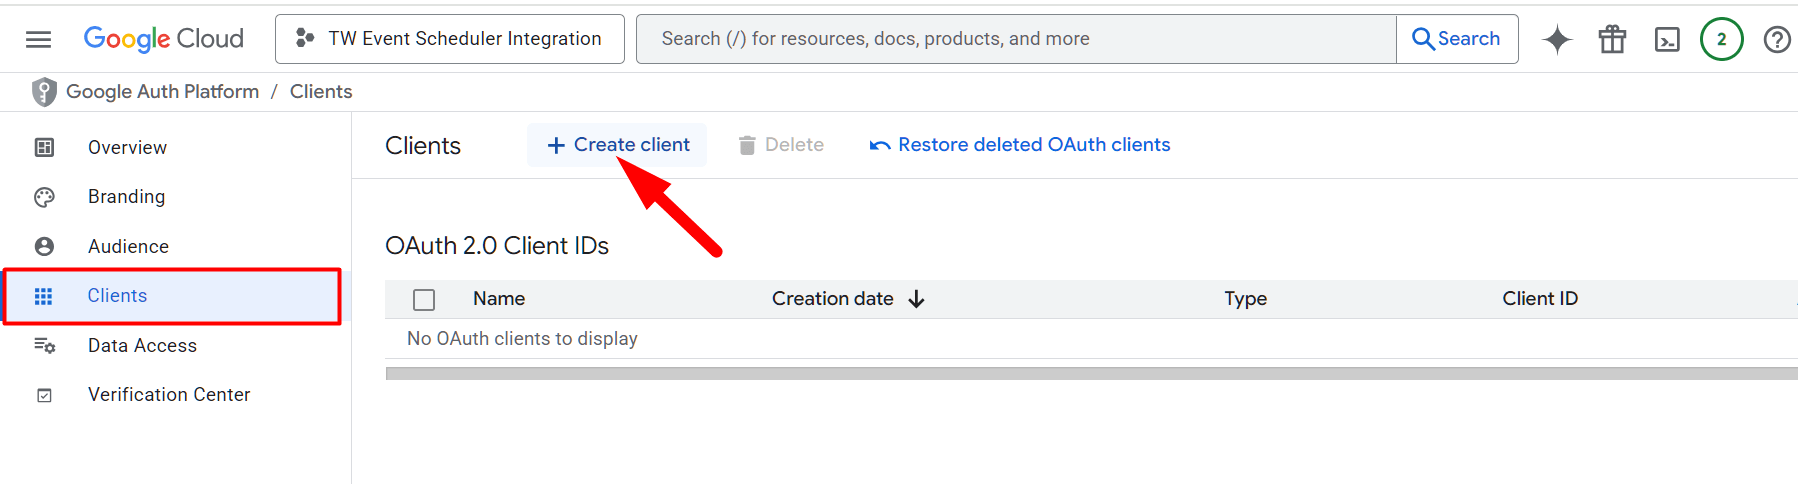
16) Go to the Clients menu and click on the Create Client button.
17) Select the Application Type and choose Web Application from the dropdown menu.
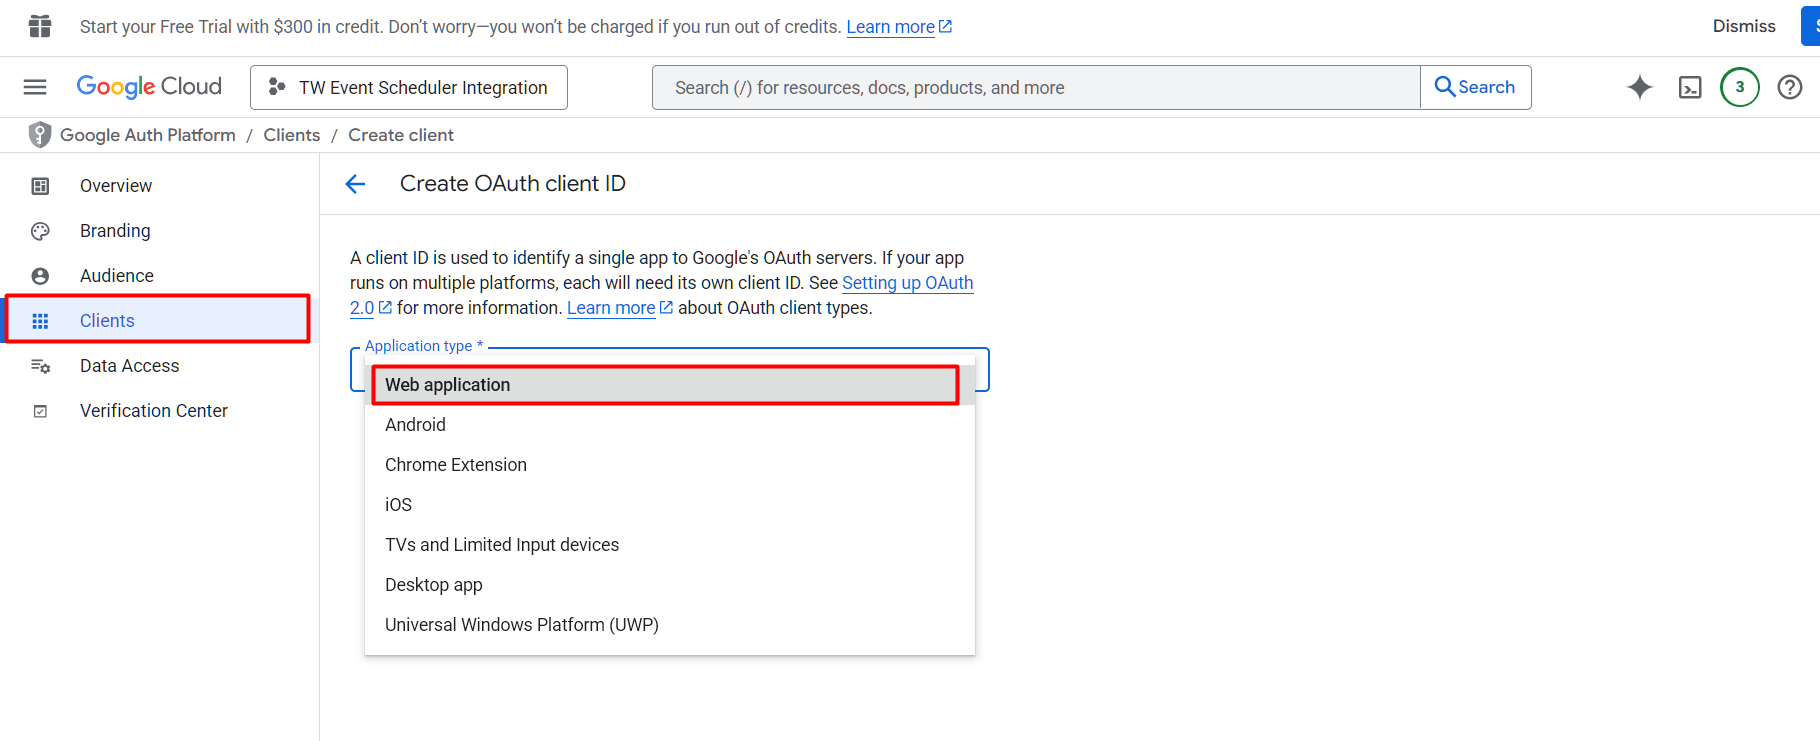
18) Now add the Client Name and the Authorized Redirect URI, then click the Create button.
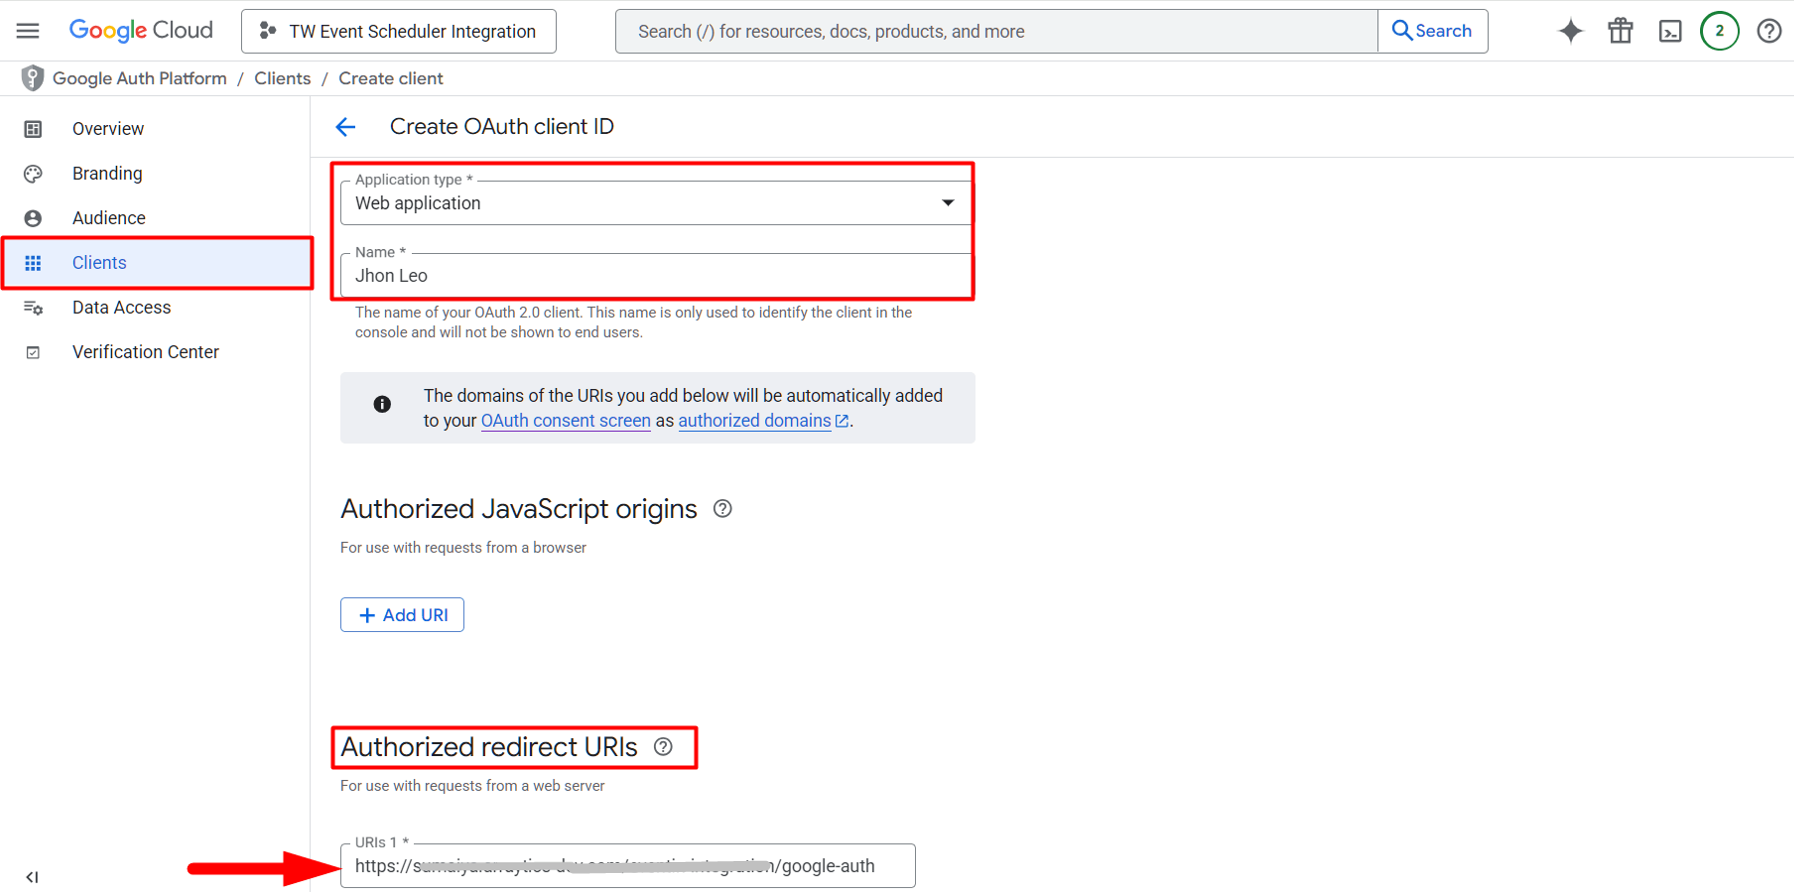
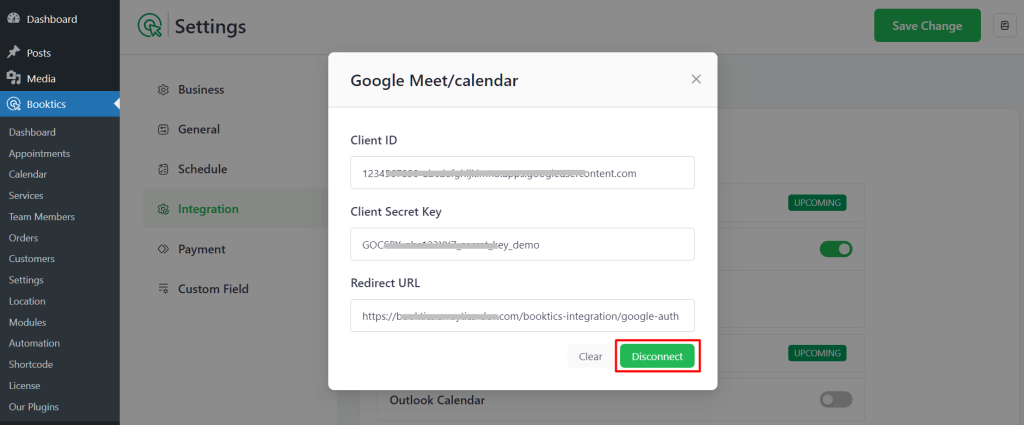
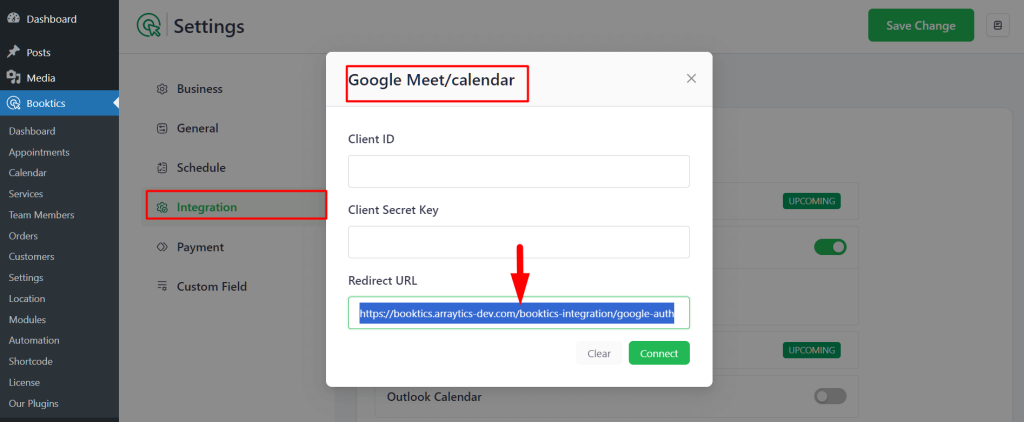
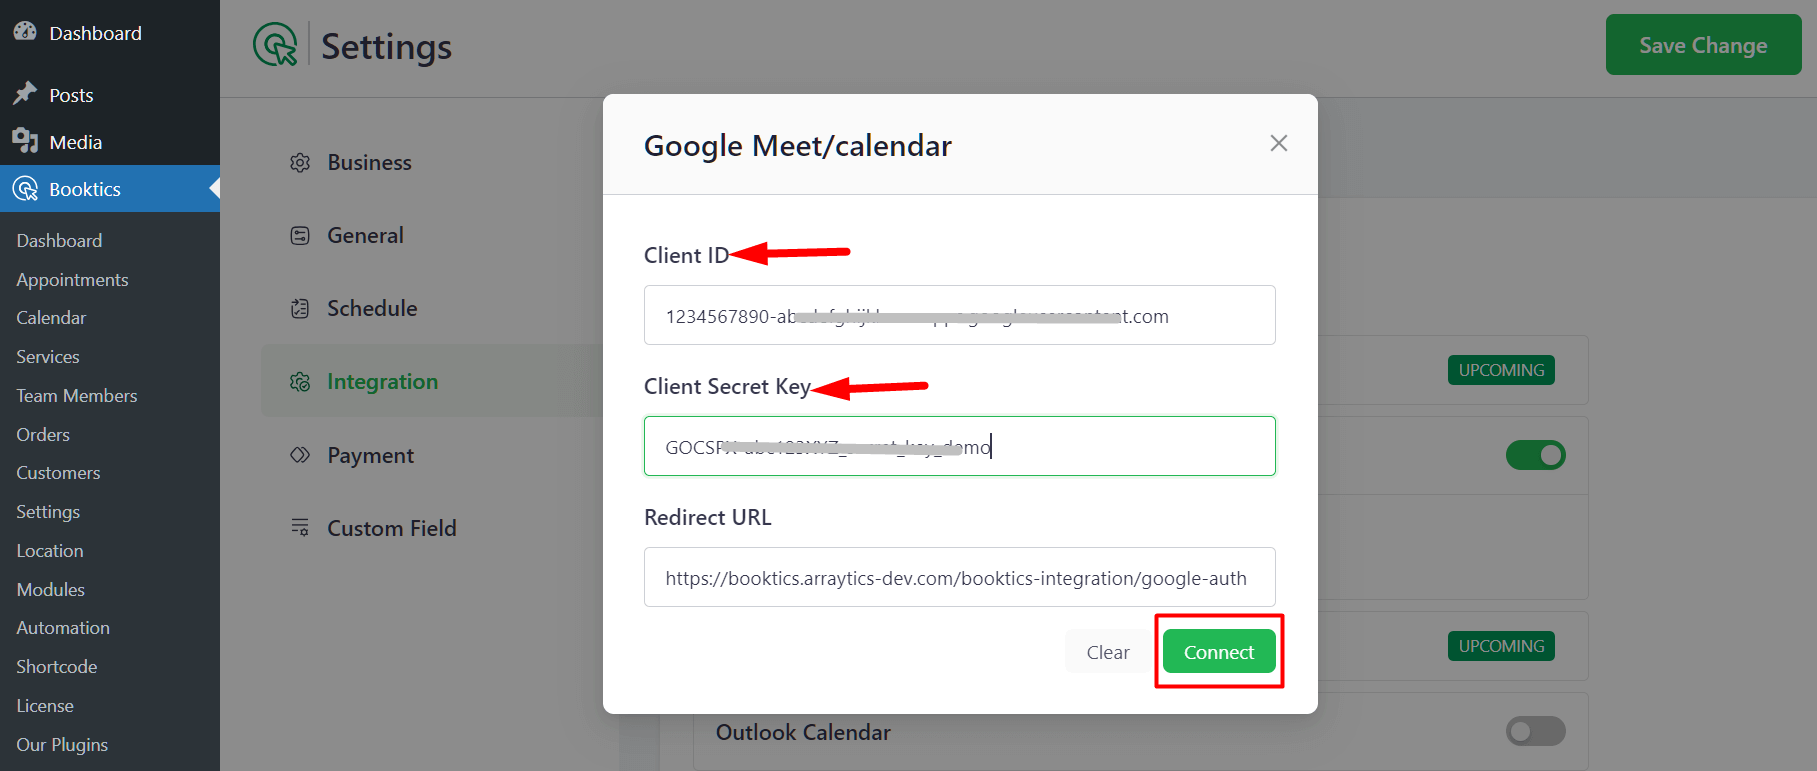
19) You will get the Authorization URL from your website dashboard. Navigate to Booktics → Settings → Integration and enable the toggle for Google Meet/Calendar. After enabling it, click on Google Meet/Calendar, and you will see the Configure button. Click on that, and a pop-up will appear. From this pop-up, copy the Authorization URL provided there.
20) As soon as you click on the Create button, a popup will appear with your client ID and client Secret code.
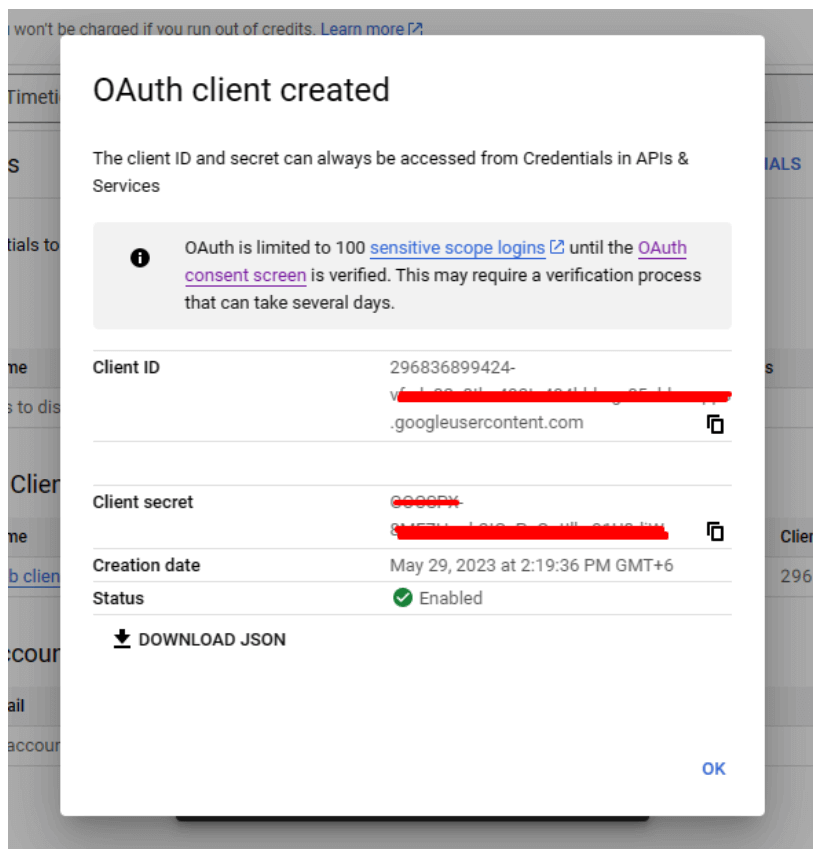
21) You will copy the client ID and client secret key from there and enter them into your website settings. After adding the Client ID and Secret key, click on the “Connect” button.
22) After verification, the Google Calendar key will be connected successfully, and your Google Calendar will be ready to use.