Zoom integration with the Timetics Booking Plugin makes it easy to add video meetings directly to your bookings. When a customer schedules an appointment, Zoom meeting links are automatically generated, and the meeting is scheduled right within the Timetics system.
There are two ways to integrate Zoom with Timetics:
- Server-to-Server OAuth: This method works automatically in the background, allowing Timetics to handle Zoom meetings without needing user interaction. It’s ideal for businesses that want seamless, automated scheduling of appointments and meetings, as Zoom meeting creation and scheduling are managed directly from the Timetics booking platform.
- General App: This method requires the user to log in to their Zoom account and grant permission. It gives users more control over their Zoom settings while integrating with the Timetics booking system. Users can directly manage meeting preferences and configurations, such as passwords or waiting rooms.
Both methods simplify managing online meetings, but your choice depends on whether you prefer automated integration or want more user control over Zoom settings while scheduling.
Follow These Steps Below to Configure Zoom
In order to use zoom in Timetics, you will need to have the following plugins installed on your WordPress site:
After downloading the plugin from the link, install and activate it on your WordPress website following the standard process.
Note: We provided the Timetics Pro and Timetics Zoom Addon with Plugin Bundles.
Here are the two connection details:
How to Enable Server-to-Server OAuth Connection
To enable a Server-to-Server OAuth connection in Timetics:
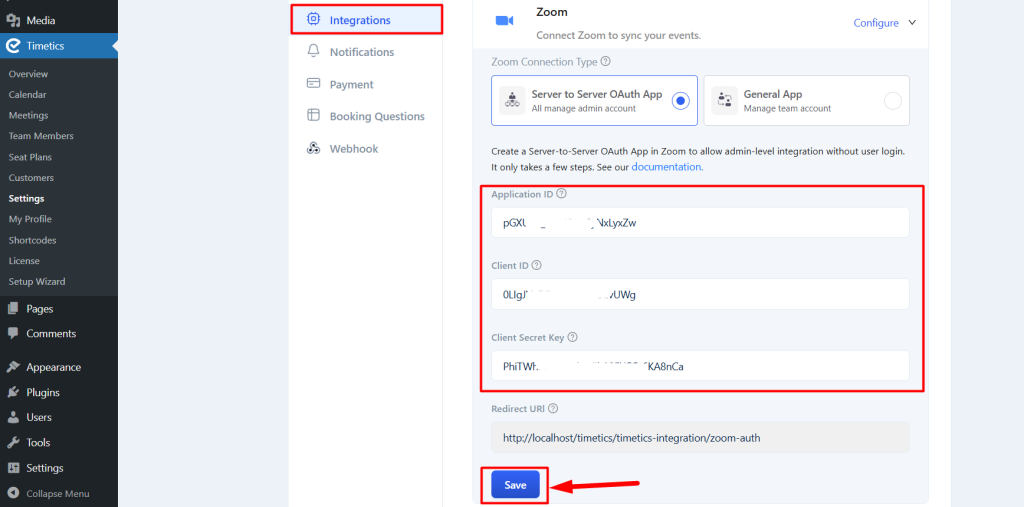
- Go to Timetics → Settings → Integration → Zoom Configure.
- Select Server-to-Server OAuth App.
- Enter your Application ID, Client ID, and Client Secret Key.
- Click Save Changes.
How to Obtain Zoom API Keys and Activate the App
To use the Server-to-Server OAuth method for Zoom integration, follow these steps:
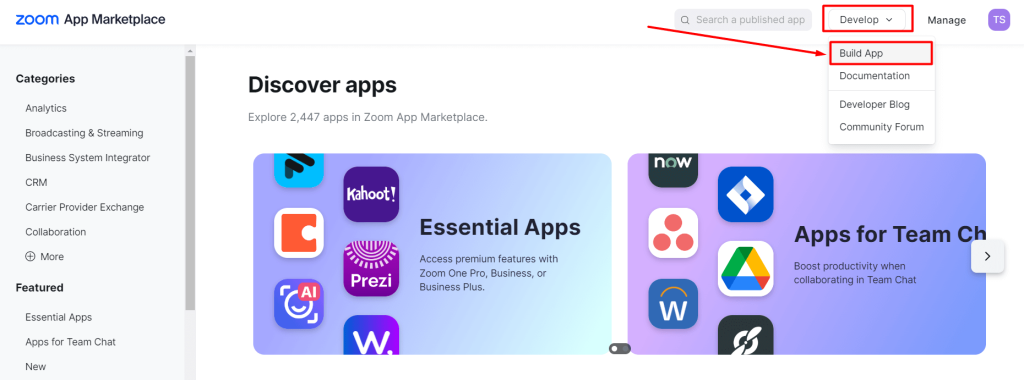
1. Visit the Zoom App Marketplace: https://marketplace.zoom.us/ and Sign In or Sign Up.

2. At the top of the page, click Develop → Build App.
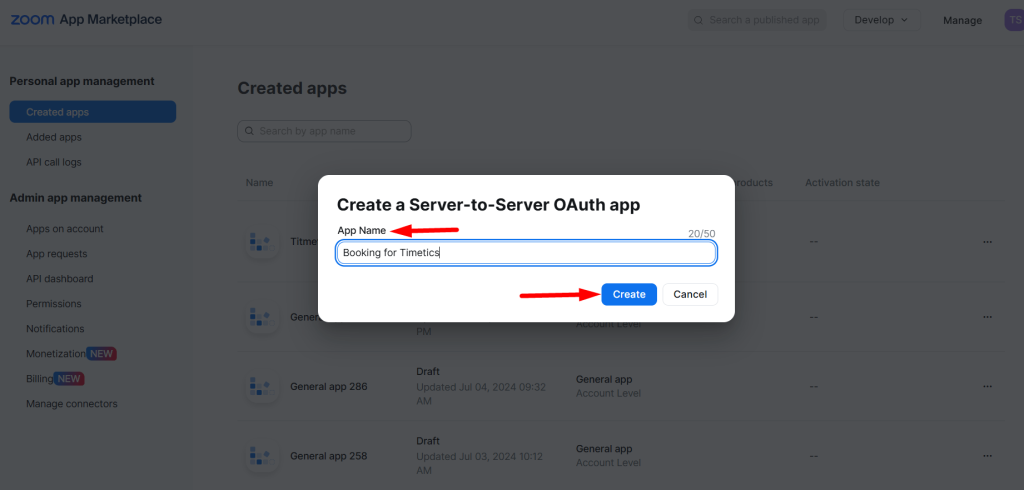
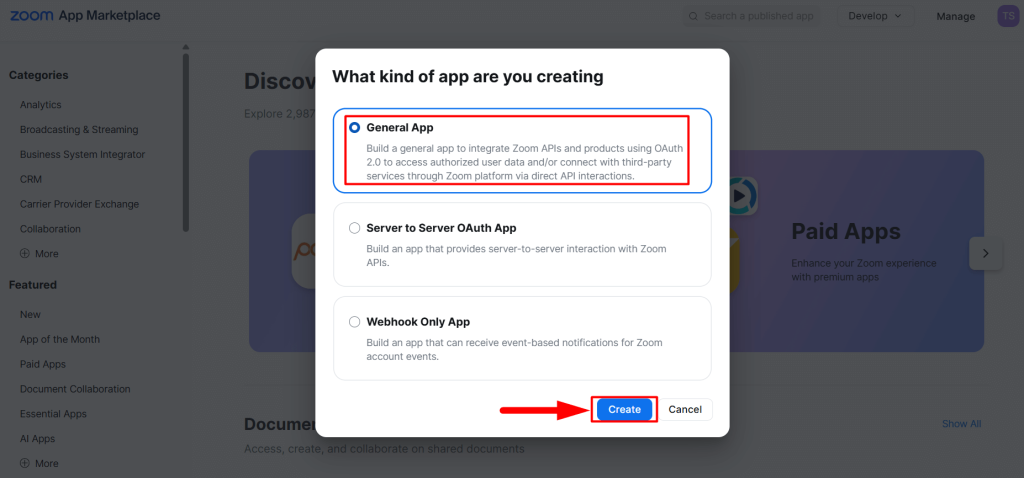
3. A popup will appear. Select Server-to-Server OAuth App and click the Create button.

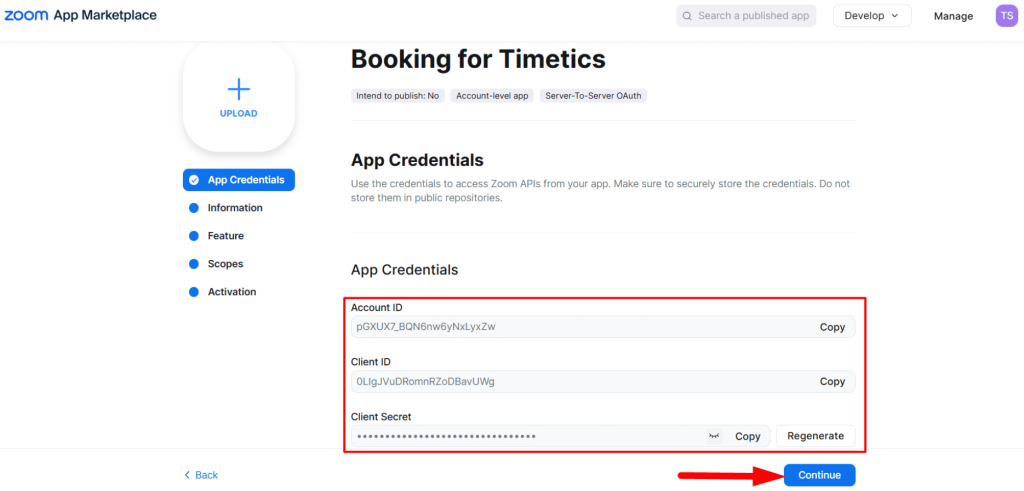
4. Enter a name for your app and click Create.
5. Once the app is created, you will receive the app credentials. From there, you can copy and paste them into your Timetics Settings to connect Zoom with your website.
Click Continue to proceed through the setup.
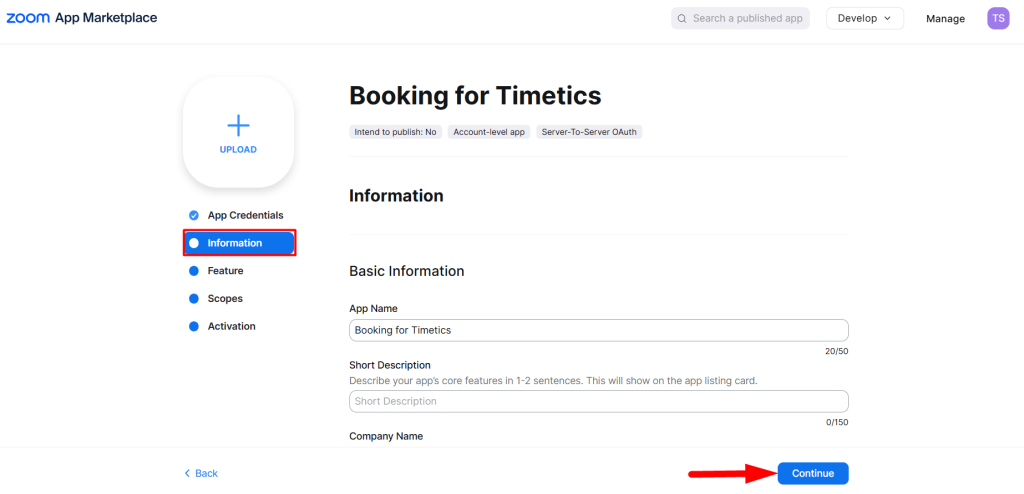
6. On the Information tab, provide the basic details and developer information for your company, then click Continue.
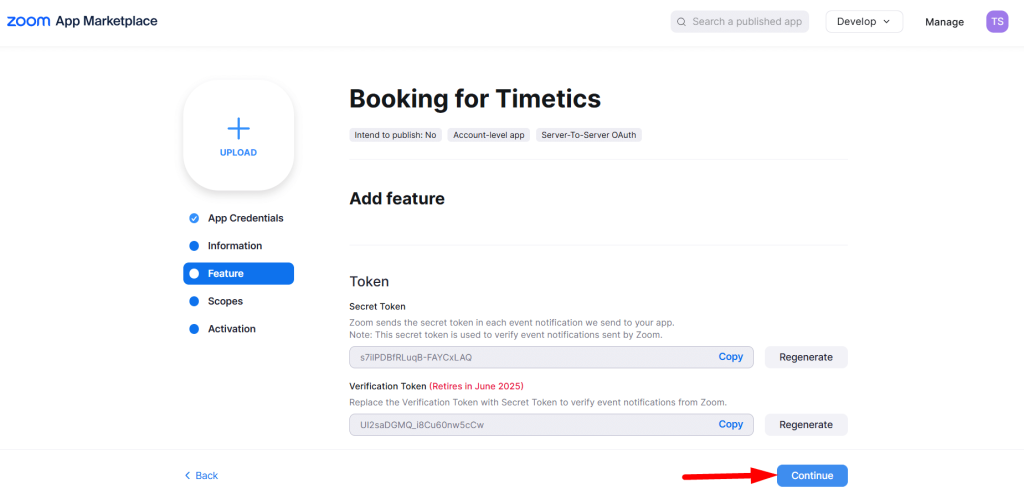
7. Skip the Feature tab by clicking Continue again.
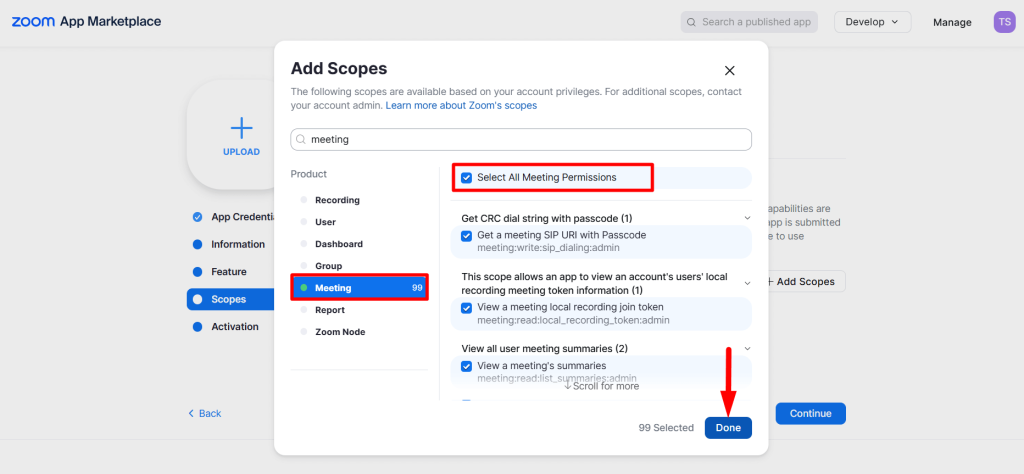
8. On the Scopes tab, click Add Scopes. Select the required scopes for Meetings and check all necessary permissions.
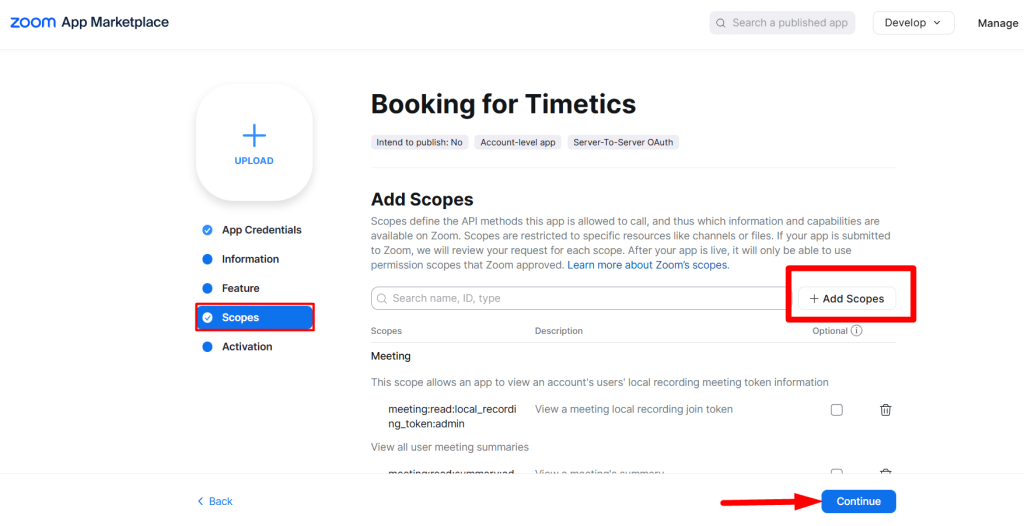
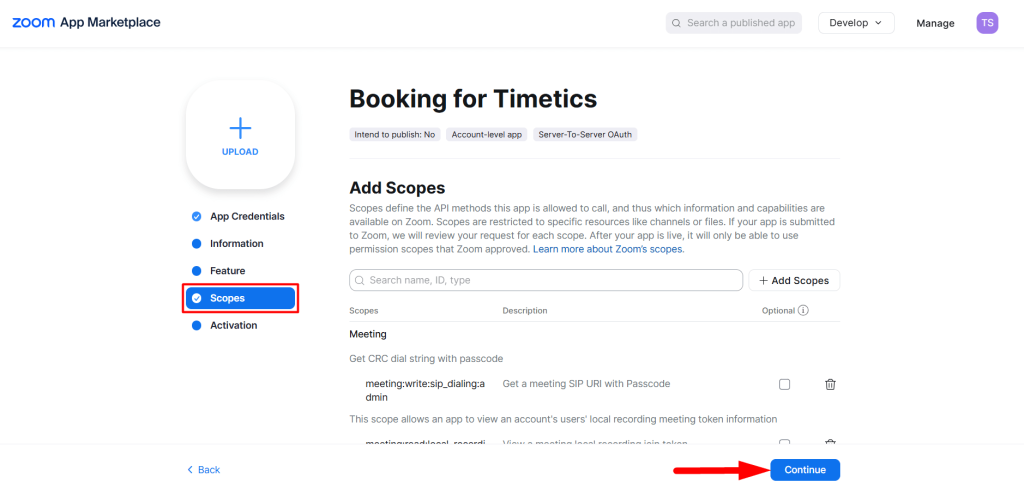
9. After selecting scopes, click Continue.
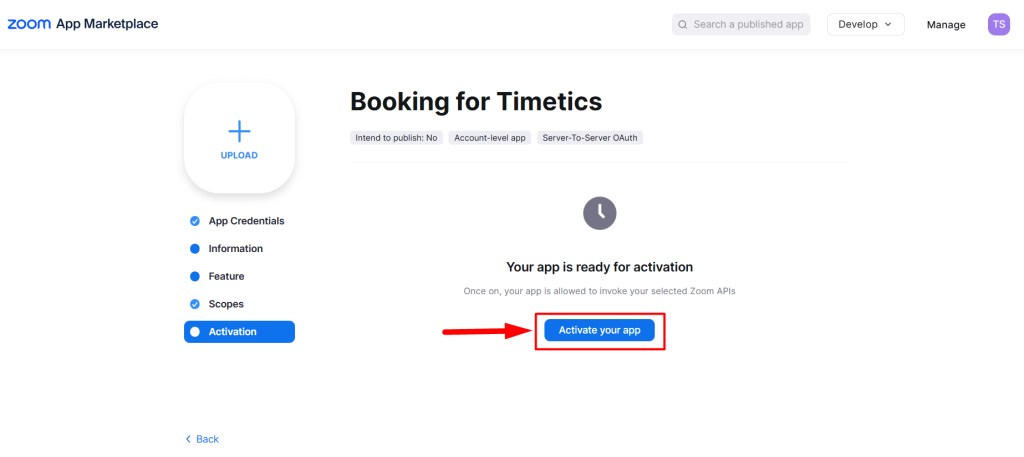
10. Finally, click the Activate Your App button to enable it for use.
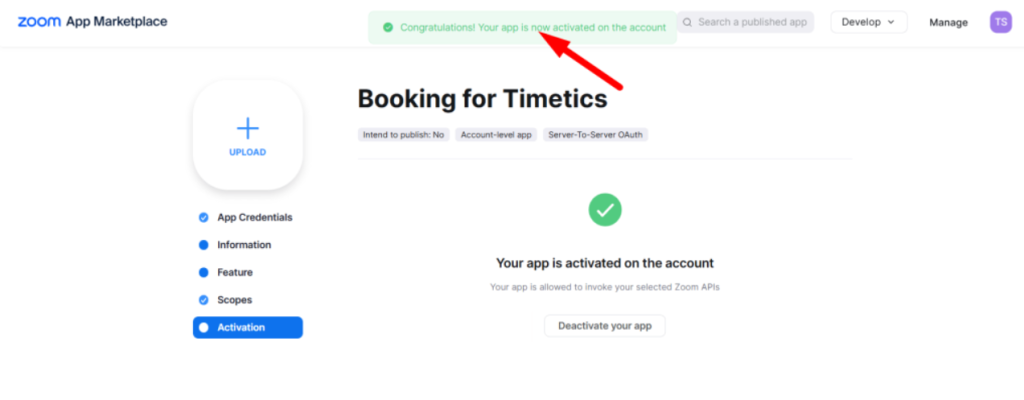
11. Now the app is created and activated successfully, and you can use it for your Zoom meetings.
How to Enable General App Connection
To enable a General App connection in Timetics:
- Go to Timetics → Settings → Integration → Zoom Configure.
- Select General App.
- Enter your Client ID, and Client Secret Key.
- Click Save Changes.
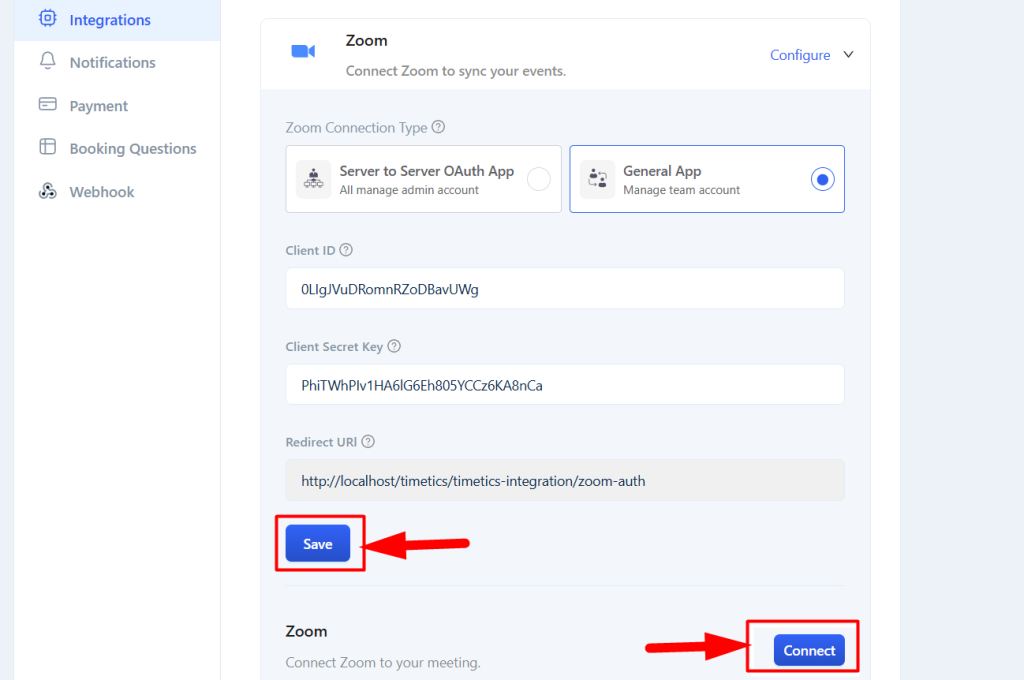
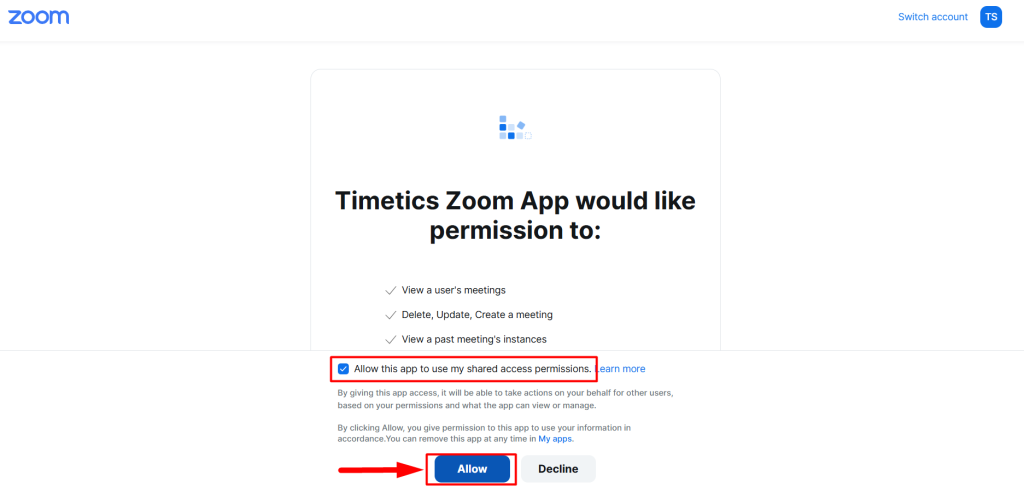
Now click on the ‘Connect’ button. You will be redirected to the permission page—click the ‘Allow’ button to proceed.
How to Obtain Zoom API Keys and Activate the App
To use the General App OAuth method for Zoom integration, follow these steps:
- Visit the Zoom App Marketplace: https://marketplace.zoom.us/ and Sign In or Sign Up.
2. At the top of the page, click Develop → Build App.
3. A popup will appear. Select General App and click the Create button.
4. Now, select ‘User-managed’ as the app type. In the Timetics settings, you will find a Redirect URL for OAuth. Simply copy this URL and paste it into the Redirect URL and OAuth Allow List fields of your OAuth app
From the App Credentials, copy the Client ID and Client Secret, then paste them into the Timetics settings.
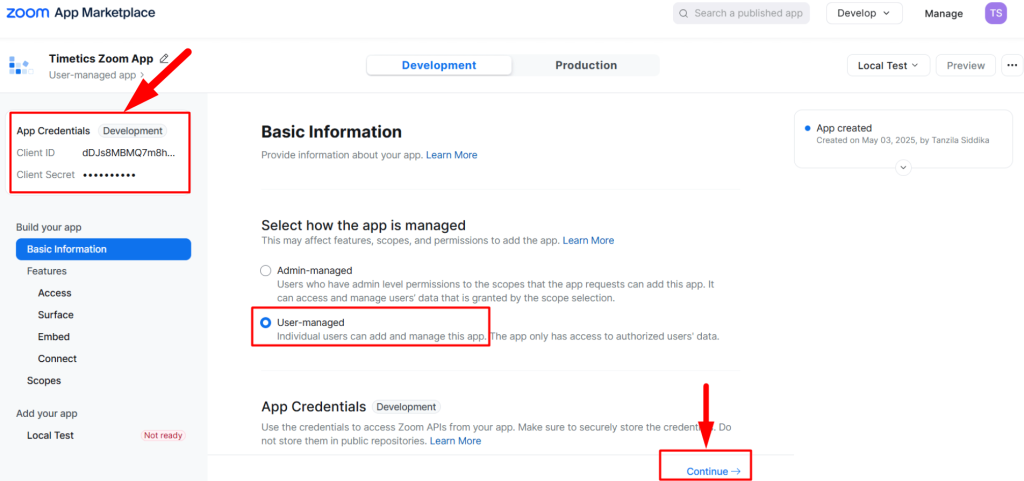
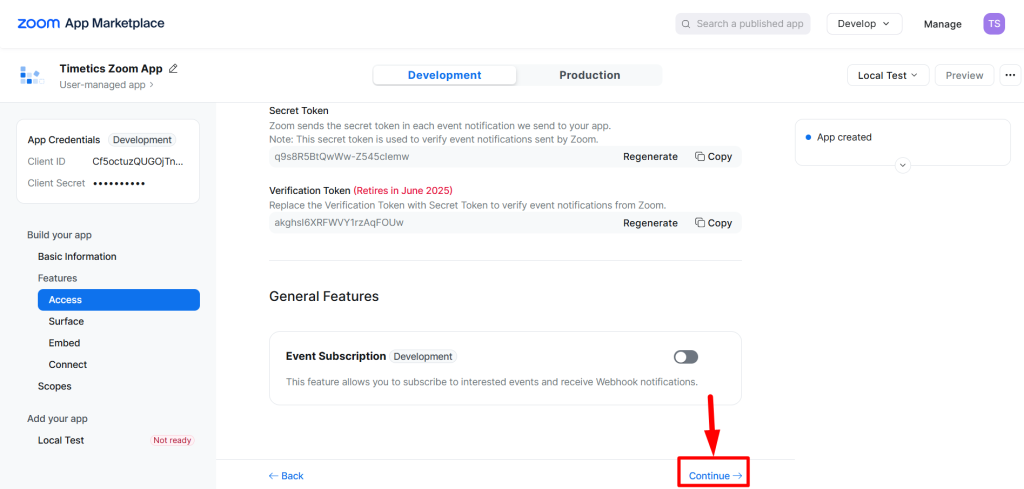
5. Skip the Features section (such as Access, Surface, Embedded, and Connect) by clicking the Continue button.
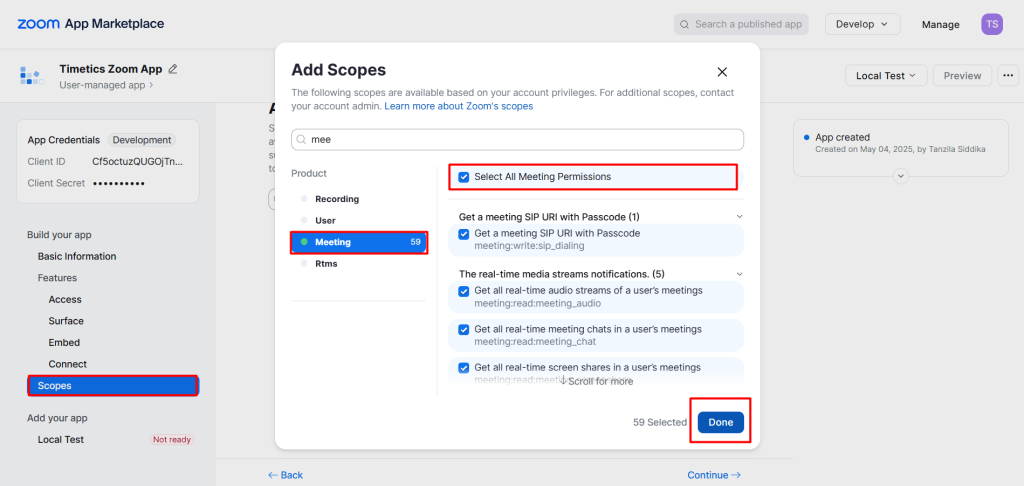
6. Now, go to the Add Scopes section and click Add Scope.
Search for the Meeting section, grant all permissions, and then click the Done button.
Create a Meeting with Zoom
Please follow the documentation on how to create a meeting.
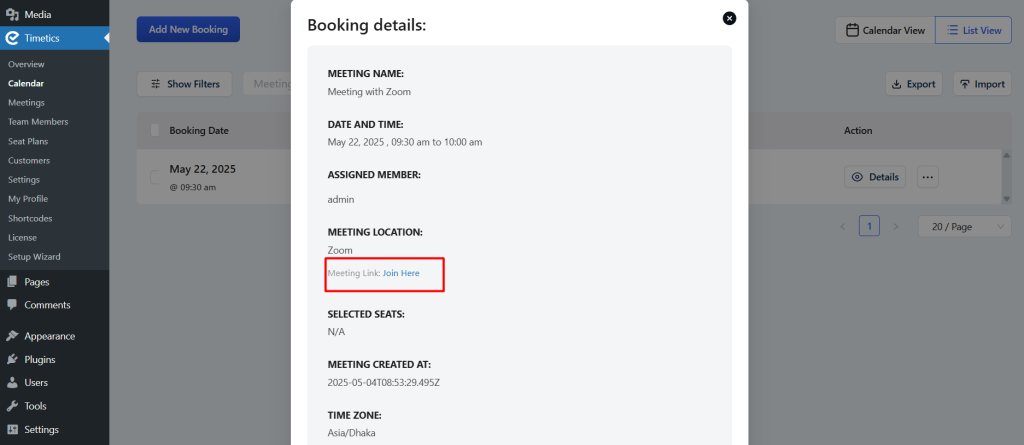
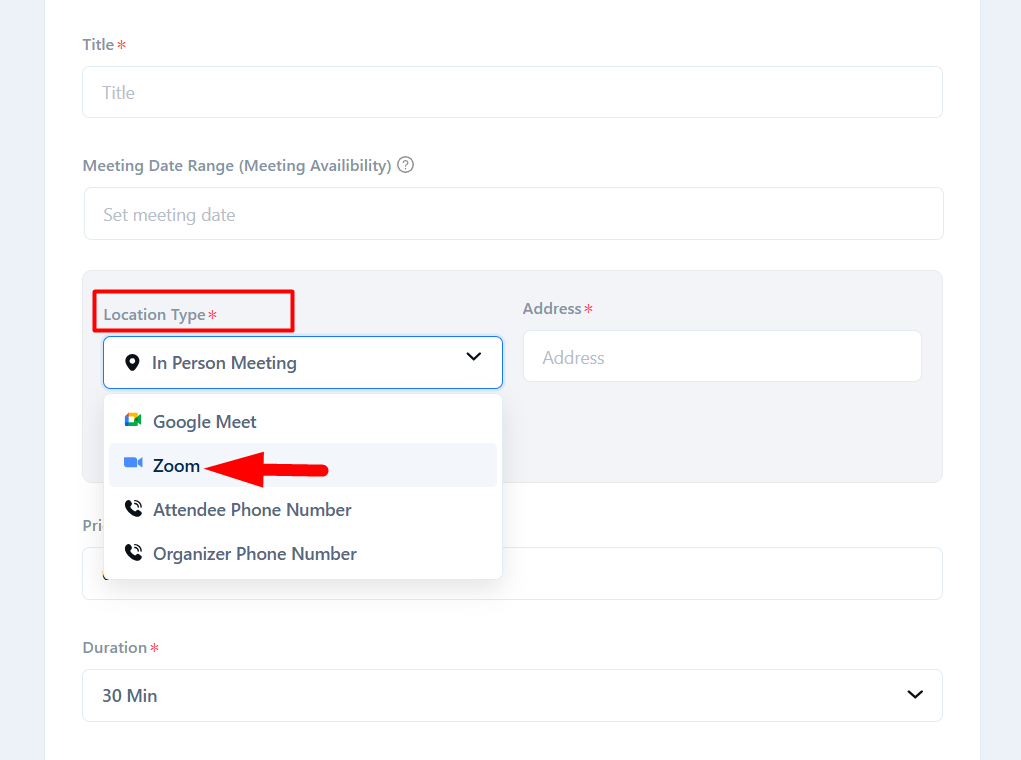
When creating the meeting, simply select Zoom as the location type.
After completing the booking, you will see the booking details along with the Zoom link.