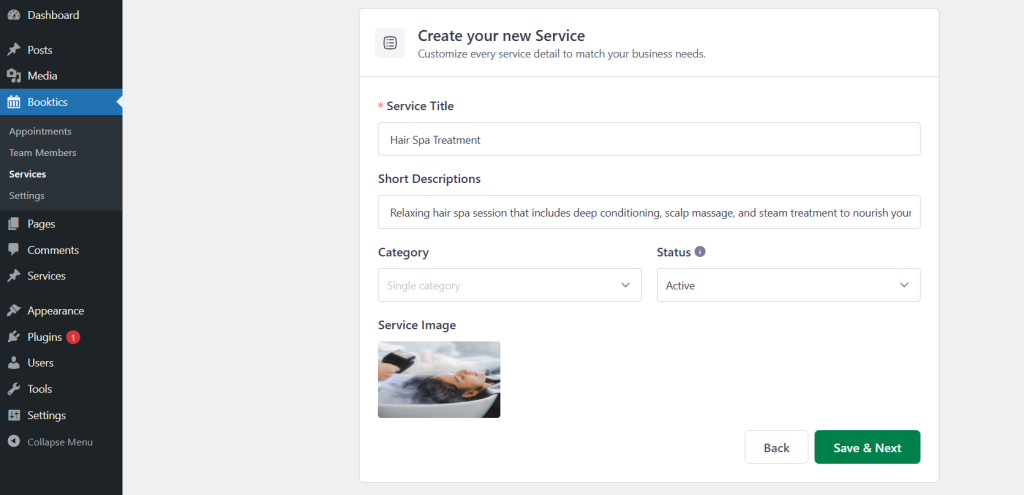
To add a new service in Booktics, follow these steps to customize the details based on your business requirements:
- Navigate to Booktics → Services from the WordPress Dashboard.
- Click the Add New button to create a new service.
- Enter the Service Title — this will be the name of the service displayed to customers.
- Add a Short Description to briefly explain what the service includes.
- Choose a Category from the list, or create a new one if needed.
- Set the Status to “Active” to make the service available for booking, or “Inactive” to hide it temporarily.
- Upload a Service Image that visually represents the service (recommended for a more professional appearance).
- After filling in all the required fields, click Save & Next button .
After saving your service, you’ll be redirected to the General Information page for that service. From here, you can configure more detailed options to tailor the service behavior.
General Information
After saving your service, you will be redirected to the General Information page for that specific service. From here, you can configure additional details to customize how the service operates.
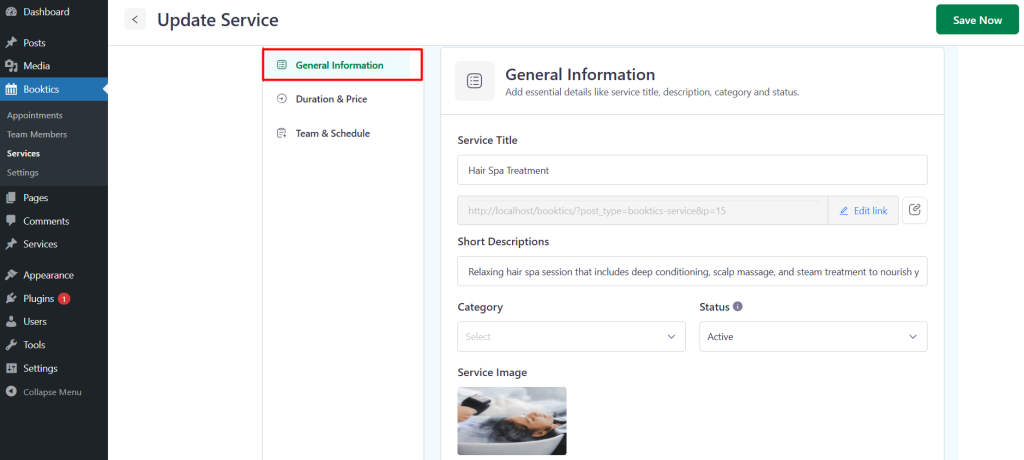
Since the general information has already been filled out, you can proceed directly to the Duration & Price tab to set up timing, pricing, and booking preferences.
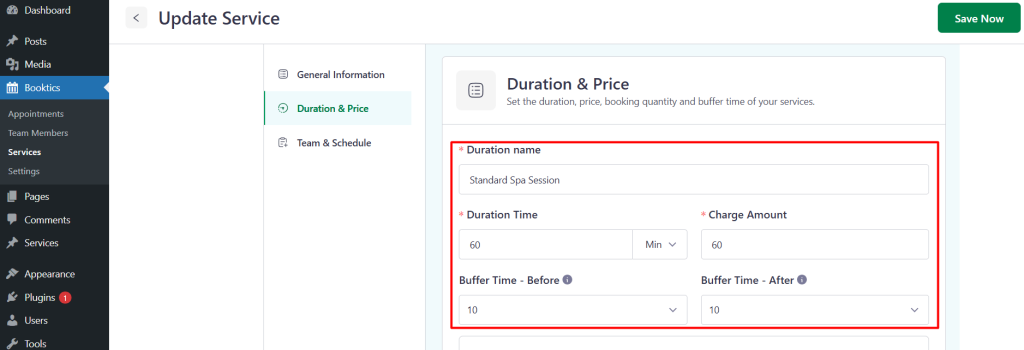
Duration & Price
This section allows you to configure how your service will be scheduled and priced. You can define how long each session lasts, its cost, how clients book time slots, and any buffer time needed before or after appointments.
1) Service Duration Details
Set the core details of the service duration.
- Duration Name: Provide a suitable name to label the time slot.
- Duration Time: Define how long the service will take.
- Charge Amount: Set the price for the service.
- Buffer Time – Before: Specify preparation time before the appointment.
- Buffer Time – After: Add time for cleanup or transition after the session.
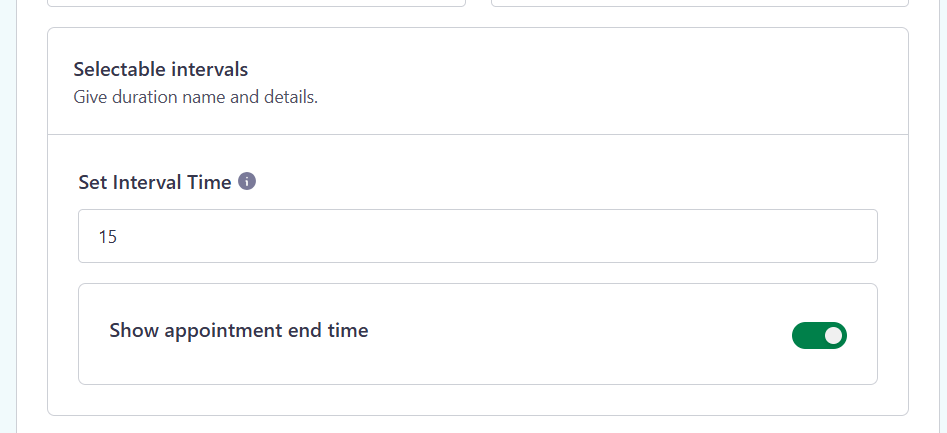
2) Selectable intervals
Configure how frequently clients can book your service.
- Set Interval Time: Control spacing between available bookings.
- Show Appointment End Time: Option to display when the session ends.
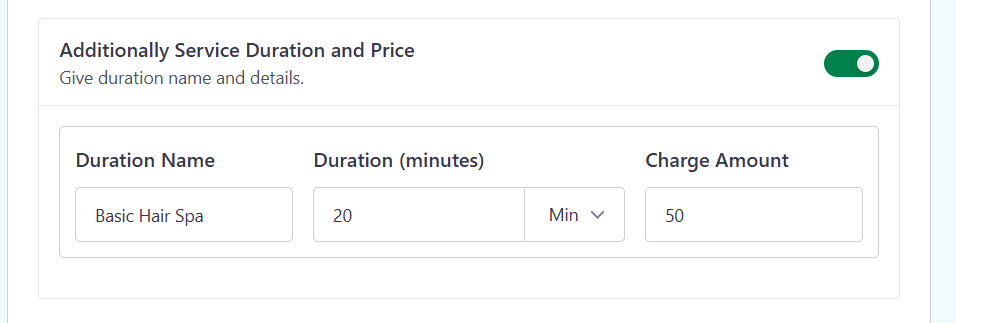
3) Additionally Service Duration and Price
This section allows you to offer multiple duration options for the same service, giving clients more flexibility to choose based on time or cost preferences.
To add an additional duration:
- Duration Name: Enter a label for the additional session (e.g., Extended Session, Quick Service).
- Duration (minutes): Specify how long this version of the service will take.
- Select: Use this option to choose or mark the active duration.
- Charge Amount: Set the price for this particular duration.
Once all durations are defined, make sure to click Save Changes to update the service with multiple duration and pricing options.
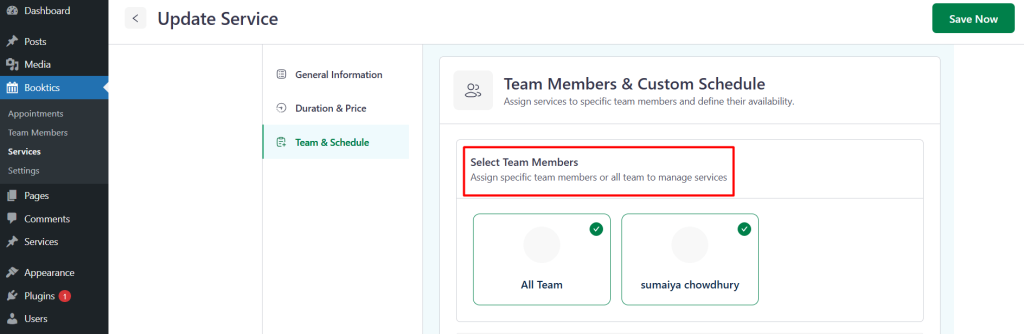
Team & Schedule
This section allows you to assign team members to a service and configure a custom schedule if needed.
Select Team Members
Assign one or more team members who will be responsible for providing this service.
Select from the available team members listed. Once selected, only those members will appear in the booking form for this service.
Set Custom Schedule
By default, the service follows the general schedule defined in the main settings.
To override this, enable the custom schedule option and define specific working hours for this service.
This is useful when a particular service has different availability compared to your general business hours.

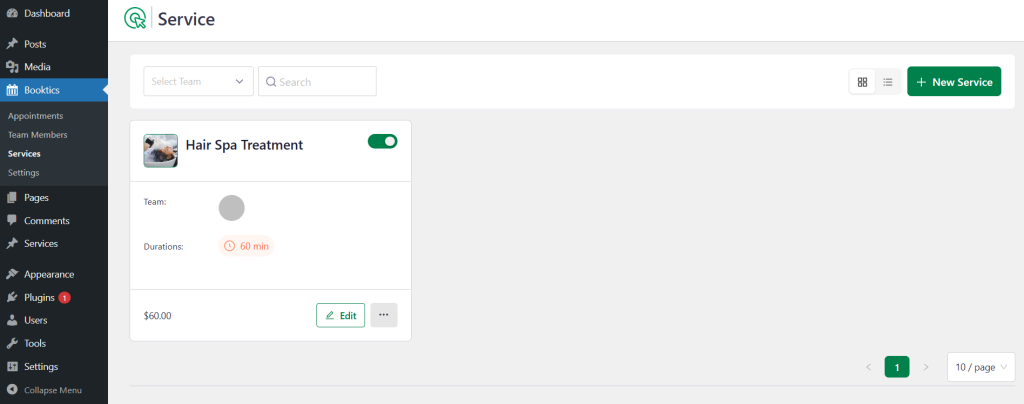
Service List
You can view the complete list of your created services by navigating to the Services menu. From there, you can manage, edit, or delete any existing services as needed.